Hi and Welcome to my blog!!
I am one of twenty designers lucky enough
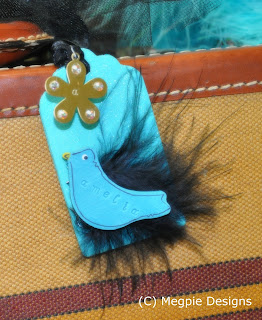
I've made a quick and easy Bag Tag
with these amazing products -
I hope you'll feel inspired to work with these
products as well!!
Be sure and enter their contest
and you could be the Grand Prize winner of
Here are the supplies needed to make the Bag Tag:
ImpressArt Supplies:
-ImpressArt Alphabet Stamp Set, Ballroom Boogie (lowercase)
-ImpressArt Metal Stamping Blank, Flower
-ImpressArt Metal Stamping Hammer
-ImpressArt Steel Stamping Block
-ImpressArt Stamp Straight Tape
Other Supplies:
4" Wooden Tag; 2" Wood Bird Cutout; (5) 12ss Swarovski Crystals;
Black Feather; E6000 Adhesive; Acrylic Paints: Turquoise,
Marigold, White, Black, Extreme Glitter Hologram;
Sanding Block; Permanent Marker; Clean Rag; Ruler
First, I stamped the Flower blank.
Place the ImpressArt Metal Stamping Blank (Flower)
Apply ImpressArt Stamp Straight Tape across the
flower and use the ruler to mark 1/8" guidelines.
Lightly drag the stamp towards the center of the tape
until you feel the bottom of the stamp
catch the top of the tape.
Strike the top of the stamp with medium pressure;
if you've hit the stamp too lightly, you can
strike again as long as the stamp has not been moved.
Use the permanent marker to color the impression.
Without allowing the colored impression to sit too long,
use a clean rag to wipe off excess ink.
(I used E6000 adhesive to apply
one Swarovski crystal
to each of the flower petals).
Use this same stamping technique to stamp the
entire name onto the wooden bird.
Paint the bird with Turquoise acrylic paint.
Sand lightly over the top of the painted bird;
this will remove some of the paint
leaving darker stamped impressions behind.
Paint the beak Marigold, and the eyes are
dip dots of white, and then black.
You could check out my tutorial
on painting dip dots *here*
Paint the front, back, and sides of the wooden
tag Turquoise. Allow to dry.
Use the sanding block to smooth
the paint on the top of the tag, and to
remove some of the paint along the edges.
Coat the entire tag with Extreme Glitter
Hologram to give the tag some shimmer.
I used E6000 adhesive to attach the feather
and the bird to the bottom of the tag.
Thread a 12" length of sheer black ribbon
through the top of the tag. Attach the
Flower charm with a split ring.
I used the permanent marker to outline
the wooden bird.
There it is! It says "spring" with a little
"bling" and I hope you like it!!
Please use the Designer Crafts blinkie
at the top of this post to Hop Forward
and check out more fun projects using
ImpressArt Metal Stamps!
And because I couldn't resist ... something just for fun:
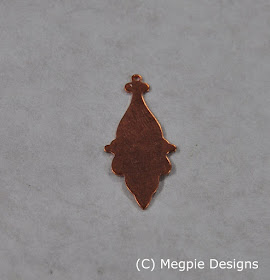
I just had to create this Santa
from one of the fabulous
ImpressArt Metal Stamping Blanks!!!
Peace and Bag Tags!!
Ho Ho Ho


I always love your projects Megan!
ReplyDeleteGreat job with the project, Megan. I like how you make the ImpressArt Stamp Straight Tape into a ruler. That was a brilliant idea!
ReplyDeleteMegan, love how you stamped the wooden bird along with the metal flower! Cute idea!!
ReplyDeletewww.mel-designs.typepad.com
What a clever project! You won't get your bag mixed up at the airport - that is for sure! Your Santa is really cute, too!
ReplyDeleteVery cute project Megan!
ReplyDeleteVery unique bag tag - love the design and colors. And how cute is that little Santa charm! lol
ReplyDelete-Molly
Sweet project Megan!
ReplyDeleteI love how the metal stamps work on so many surfaces! Great idea using the wood and the Santa is just too cute ;0)
ReplyDeleteLove the stamping and the incorporation of the feather too - two hot new products to combine right now! And I love the santa - that was brilliant! - kg
ReplyDeleteI just love your "Blingy-Springy" bird tag but I have to say I just LOVE...LOVE...LOVE the little Santa! I've been challenged to make Christmas cards every week for Unscripted Sketches and he just warms my heart!
ReplyDelete