
Here is the third in a series of five
Quick and Easy Bazaar-Worthy craft tutorials.
(you thought I wasn't going to post today, huh?)
haHA!!!
Some days, I even surprise myself.
Moving On ...
Snowman Snowflake

I debated making this a magnet instead
of an ornament;
and I've made enough of them that I
could do both. My kids are always bringing
home artwork from school that
they like to see posted on the fridge - and what
better way than to post them with
a super fun snowman snowflake magnet!

The Basics:
wood snowflake cutout,
1" wood button plug,
acrylic paint: white, black, sparkle glaze
sanding block for smoothing surfaces
pink powder blush and cotton swab or sponge dauber,
stylus for dotting eyes and coal mouth
Plaid Slick fabric paint: orange
Crop-o-Dile, hand drill, drill press, or hubby
(to drill the hole if you're making an ornament)
6" length of wire or ribbon for hanging
(you won't need a hole if you're making a magnet)
glue gun and glue sticks
appropriate sized paintbrushes:
sponge roller or 1" wash brush for snowflakes,
1/2" flat brush for snowman heads
Getting Started:
Once again, my motto is:
Always Paint in Multiples!!!
(if you're even the slightest bit curious
as to why this is my motto, please read the
previous post, where I explain)

Base coat your snowflakes and your button plugs
with two coats of white acrylic paint.
I'm showing a 1/2" flat brush in the photo,
but you could use a sponge roller if you're making
several snowflakes - it'll go much faster.

Don't forget to paint the backs and sides
of your ornaments! They will look
more "finished" if you do this, and if you're
personalizing these, you'll have a nice smooth surface
for your paint pen or marker.
Which brings me to ... sand the fronts and backs
of the snowflakes to smooth the wood grain that has
been raised by the acrylic paint.
Sand the edges of the snowflakes more heavily.
Brush a coat (or two) of Sparkle Glaze onto
each painted snowflake. The more coats you apply,
the more shimmery and glittery your snowflake will be.
(I don't add Sparkle Glaze to the backs).

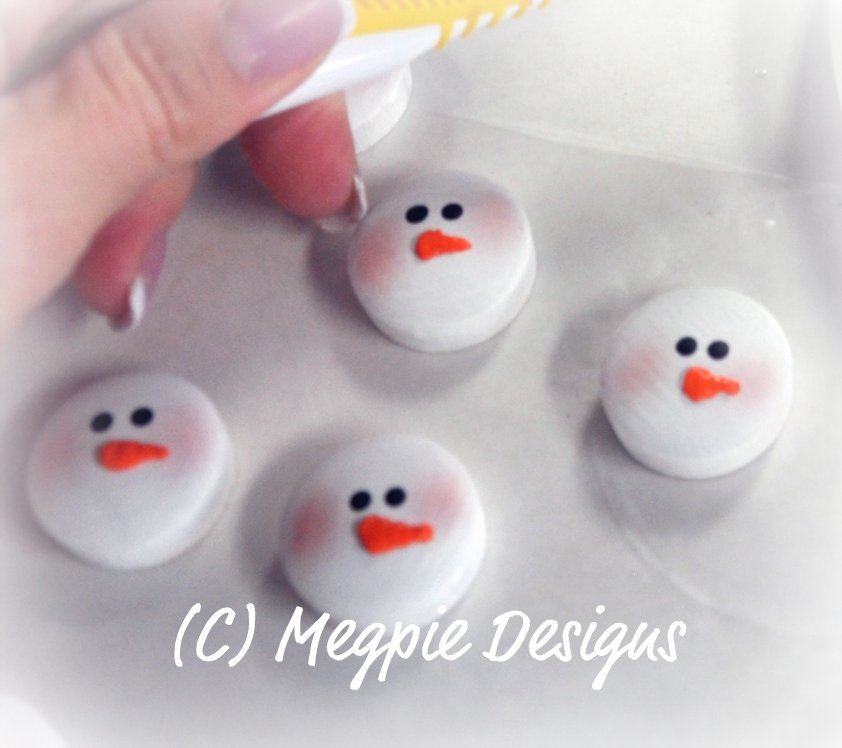
Blush the cheeks with pink powder blush
and a clean cotton swab or sponge dauber.
Use a circular motion to "scrub" each cheek til it
looks flushed and blushed!!
I use a stylus dipped into a small puddle of
black paint to dot the eyes.
Re-dip your stylus before each dot to ensure
same-sized eyes. Likewise, dotting
twice before reloading with paint will give you one
eye slightly smaller than the other.
Whichever suits you.
For the noses, practice first on a piece of paper
until you're please with your carrot results.
In general, you'll start at the base
(or the largest part of the carrot) and move to
the right, gradually applying less pressure so that you
end with a small "tip"
Try using a tight back-and-forth scribble motion
until you like the way your carrot looks.
Keep in mind, all carrots look different and
very few are just The Perfect Size and Shape,
so you need to be "okay" if they're not perfect.
Trust me, a big orange triangle on a round white face
is most definitely going to look like a carrot.

Dip dot the mouths in the same manner as the eyes.
I start in the middle of the left cheek,
reload my stylus for the first three dots so they
are the same size, then I don't reload before I dot
the last two dots ... therefore
they look smaller as if they're going away from
your point of vision.
Does that even make any sense??
This isn't my sharpest time of the day.
Use the glue gun to apply the snowman face
to the center of the snowflake:
here's a pic of me glue gunning a snowman face
to a completely different project,
but you get the idea:

Press.
Hold.
Stuck.
Instant Gratification.
I love my glue gun.

Punch a hole with your Crop-o-Dile,
or drill a hole with your hand drill, your drill press,
or your hubby's drill press,
and thread a ribbon through and knot the ends.
I added a red bow just because I had
some red bows that hadn't been dedicated to
any specific projects yet.
OR ... you could use your
glue gun to attach a button magnet to the
back of your snowflake for instant
fridge decor.
I'm off to spend the next three hours on the road,
make an appearance at the school fund-raiser
tonight (which hubby will attend without me)
and hopefully I'll find the time to
read my camera manual,
because I am not liking the pics I'm taking.
I'm sure it's the operator -
that chic should really read the manual.
*Peace and Fridge Magnets*
6 comments:
super cute!
I wish I saw this before last Christmas. I can't wait to make them!
Thank you, Bug Gal and Sherry! :)
I think I'm making 100 of these for the school this year. Maybe. ;)
These are so adorable! Great job! Would love if you'd join our Countdown to Christmas link party! Hope to see you there! Have a great week! :)
http://dixie-n-dottie.blogspot.com/2012_12_04_archive.html
LOOK REALLY CUTE!! SHARPIES WOULD ALSO DO FOR THE FACIAL FEATURES. ALSO A LITTLE DIAMOND DUST ON THE SNOWFLAKE'
Post a Comment