Showing posts with label creative. Show all posts

Sunday, June 29, 2014

Dance Prop - Sign

Hi! It's me! Back from the ... road, I guess!
The title of my post is Dance Prop - Sign,
because, well, it's a sign that we needed for our
Nationals number we'll be doing in
Orlando next week; but more importantly ...
I got to paint!! I painted!!
I'm. So. Happy.!!

That's enough, I don't want to be too
wordy after being silent for so long, it might
throw us all into some sort of shock.

 
I tried to take enough step-by-step pics
so that explanations wouldn't really be necessary
for each photo. I always use tracing paper
and make a pattern of all of my letters/words first,
then I can play with spacing.  I chose the
granny/grampa pics because our number
is titled Church Ladies and it very much fits
our dance!  I included two pics (although not very
good ones ~ sorry) at the end, that I was able
to take during rehearsal last week.

Enjoy! 


This is the sign from March, which
replaced the sign from February,
and is now being replaced with a July version.
;)


Peace, Granny!!


~ Peace Out ~


One more photo if you've read this far;
today is my birthday.
This is the first pic I've actually been in
on purpose since my episode in December.
I mean, there's always that random
photo where I'm in the background talking
or chewing or making a bizarre facial contortion ~ 
those pics rear their ugly heads more often than
I'm completely comfortable with.
  I had lots of inflammation after
my emergency surgery, inside and out, and
I've had to change my diet and be religious about
it.  No sodas, no gluten ...I won't bore
you but it's been really tough, and requires
much longer stays in the grocery aisle reading
labels.  Which, by the way, are printed with such
unnecessarily tiny print ... and I already have
to hold the box out as far as my arm will
reach to read the label ... it's a long, long
trip to the grocery store, is what I'm saying.
I believe I'll start ordering my GF
foods online.  From the privacy of my own
home.  Where I can enlarge the print to
max x4000 and no one has to know.
Shh.  Don't tell!


 PPS  Yes, it's 1200 degrees outside
and I'm wearing my sweater.
I told you I was getting old!!
Wednesday, December 11, 2013

Clay Dough Ornaments

Bright, White Clay Dough


While I can always use the salt scrub effect
on my dry, papery man-hands ~
(you know, rinsing my paintbrush after every
color change really does a number
on my skin!)
~ I've made the salt dough ornaments.

You know, the classic 
"been there, done that"
so when I found a recipe for smooth, bright
white ornaments ... I had to try it!


Here's the recipe:

2 Cups Baking Soda
1 Cup Cornstarch
1 1/4 Cups Water 

 
 Stir ingredients together in a 2 quart saucepan.


Bring to a boil over medium-high heat,
stirring constantly with a wooden spoon.


Continue to stir until mixture is boiling.


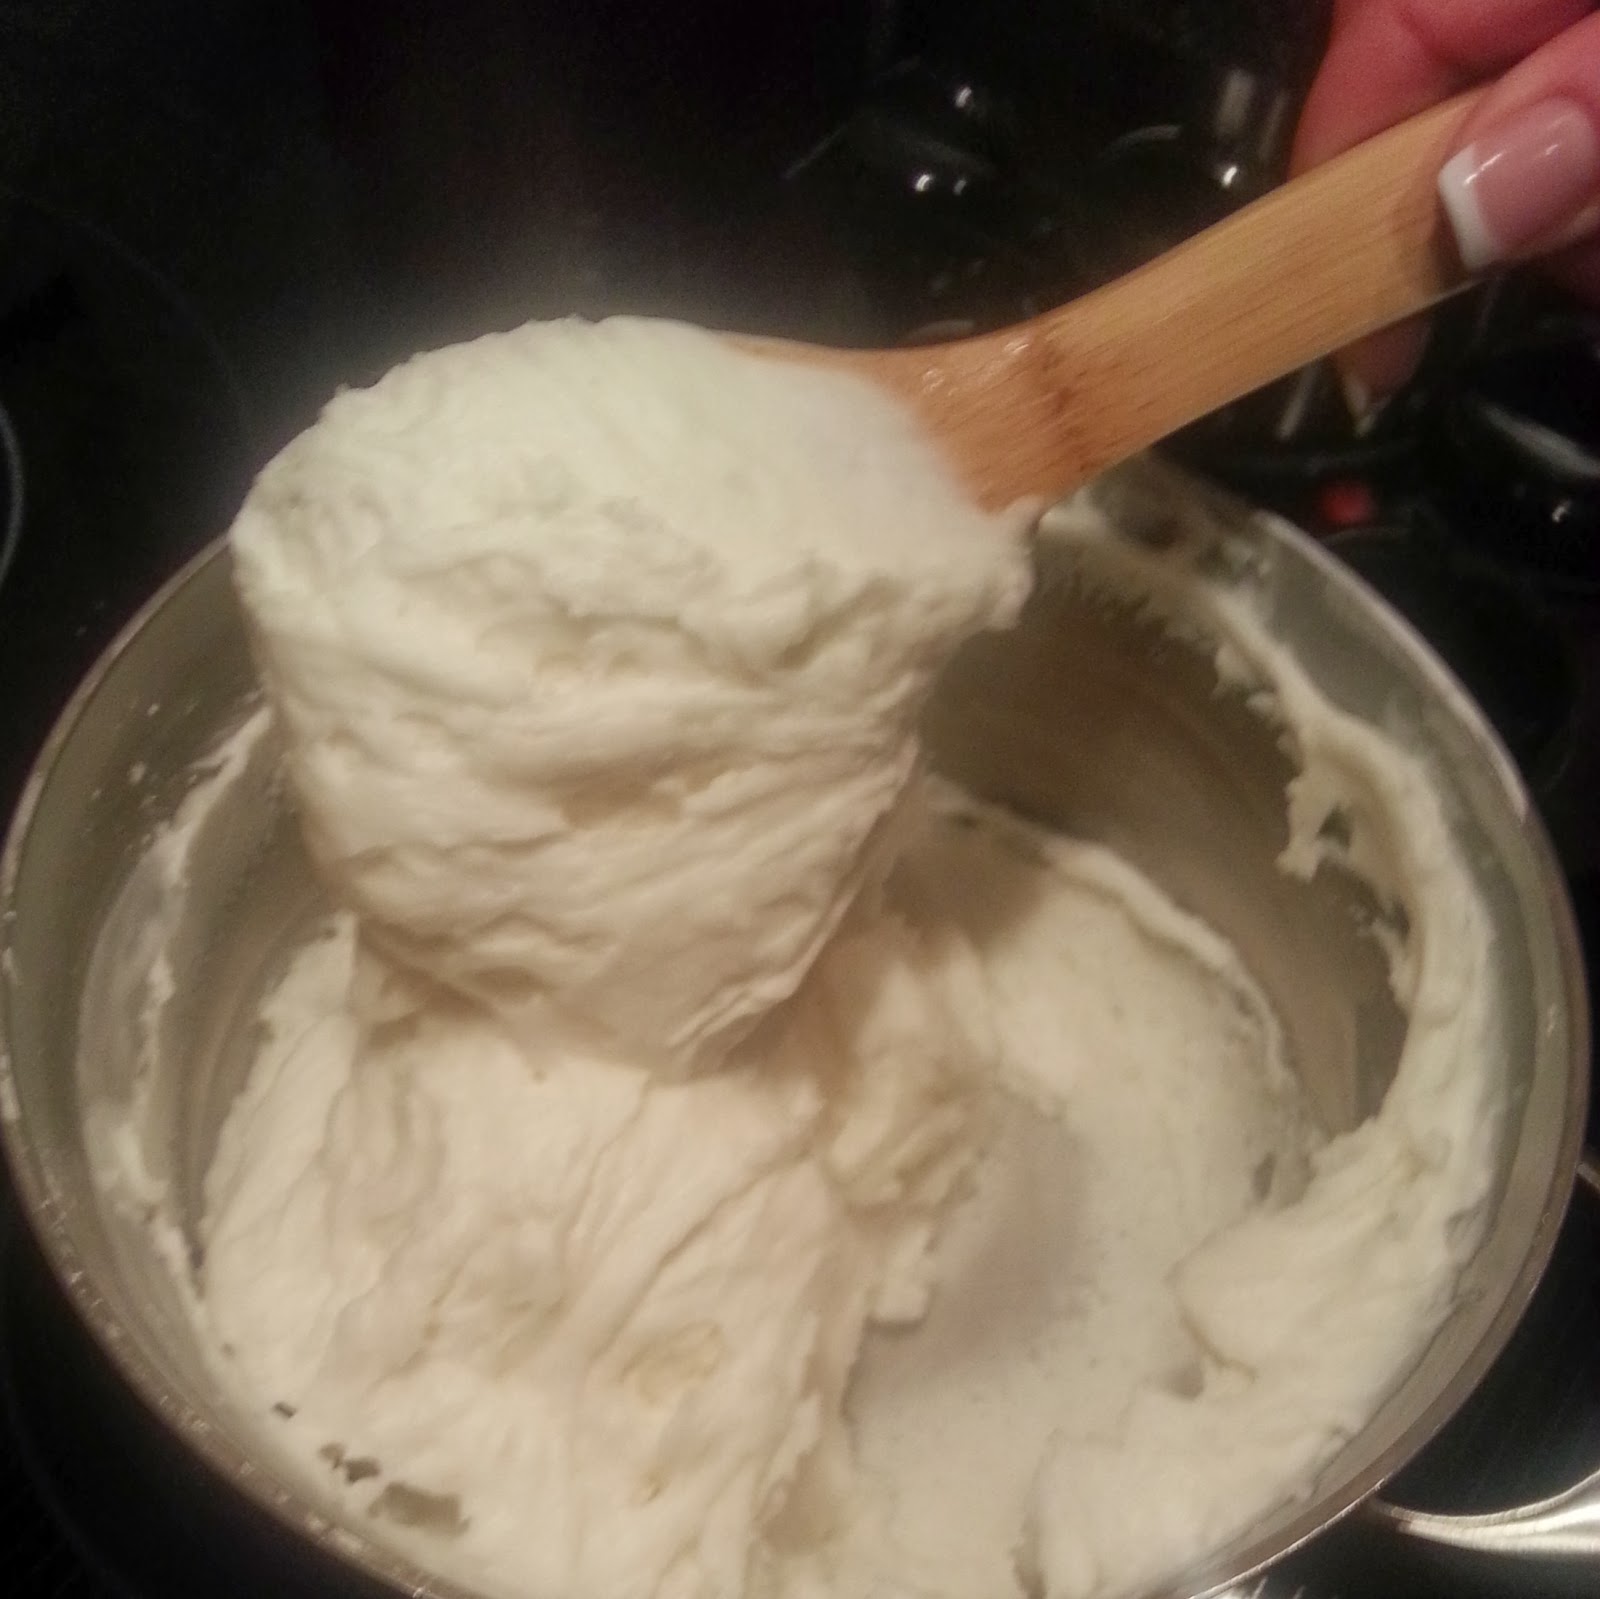
Once the mixture starts to boil,
things will happen quickly!  Continue to
stir ~ suddenly the mixture will
resemble mashed potatoes.


As soon as the mixture looks like mashed
potatoes, immediately dump onto
a cookie sheet and cover with a damp
towel.  Allow mixture to cool.


Spread work surface with a light
dusting of cornstarch.

Divide dough in half, keeping the
unused half under the damp towel to
preserve the texture.
(It dries out fairly quickly).


Use cookie cutters or small knife to cut shapes.


Don't forget to poke holes for hanging!
I used a straw.
You could also use rubber stamps
to make impressions on the soft dough.
Love the idea, but we were iced
in and unable to even leave the driveway
and my stamp collection resides
down the street and across the way in my
studio.  Which might as well be in
Siberia since I can't leave my house.


Shapes will air dry, but you can speed
the drying process along by placing
them in a preheated 250 degree oven.
After 15 minutes, turn the shapes and
continue to dry, or bake another 15 minutes.

Allow to cool before painting
and adding ribbon for hanging.


~ Peace and Productive Snow Days ~


Tuesday, November 19, 2013

Personalized Canvas

Now that I'm comfortable painting
Cardinals, it's time to switch it up and
leap outside my comfort zone ...
to Hornets!


I painted this personalized canvas for a
teenager - I wanted to make it big and bold
(since my last hornet was only 2" tall!)


Let's pretend I still have a photo
of the blank 12" x 24" canvas ... and that
I took pictures while I base coated it.
uh - hm.
Visualize a paper plate with a large puddle
of dark gray acrylic paint and a large
overlapping puddle of white acrylic paint on it.
Now visualize rolling a sponge paint
roller randomly through the paint and
applying it to the canvas.
 
Does your vision look something like this?
 
 
I made a pattern of the boy's name and
the oversized hornet and used
transfer paper and a stylus to get the
main pattern lines onto the canvas.


Then I took a flat brush and wet it,
blotted it on a paper towel, and dipped one
corner of the brush in a small puddle
of the dark gray paint.


Next I went around the left and lower
sides of each main pattern line,
reapplying paint to the brush as necessary
(usually after every long stroke).


You're just going for some quick dimension here,
don't focus too much on perfection.
I always shade again after the base-coating
has been completed.
 
 
Next, I added some short, quick highlights
on the top and right sides of the letters
with white acrylic paint loaded the
same way; on a clean blotted flat brush
with the paint only on one corner.
I base coated the main design.
(using school colors and more than
one coat for opaque coverage)
 
 
Yikes!  Scary eyes!
More fitting for a demon than an
aggressive little Hornet.  We'll fix 'em!
 
 
I added a basketball for this Hornet.
Grant is our basketball star, after all!
I used a darker shade of my base color
to go over the bottom third or so of each of
my letters.  This adds a bit of interest.


Now its time to repeat the shading around
the left and lower sides of the
letters and the hornet design.  Once the
shading has dried, I apply highlights in the same
manner, but to the top and right sides
of each design element.
 
I added some highlights to those scary eyes,
and to the parts of the hornet I
wanted to appear more dimensional.
 
 
I used a very thin liner brush dipped in black
paint to outline the hornet and the letters.
I used a 1/4" flat brush to add some
border lines around the edges of the canvas.


My paint supply at the house was limited,
so in order to paint the top third
of the letters with a lighter shade of blue,
I mixed a tiny bit of white in with my original
blue base coat color.


I thought the border outline was a little
boring, so I added a thin white
line to the top and right sides of the
main black border line, and a little gray
to the left and lower sides.
Still didn't pop, so I used the liner brush
dipped in black again and sort of
outlined each design element
(letters, border, and some of the hornet)


I added some highlight lines
with the liner brush and white paint.

Once the paint was completely dry,
I used an emery board (limited supplies here)
and sanded a bit off the basketball
and the right sides of the letters.

I brushed two coats of sealer onto the
top and edges of the canvas.
I used Mod Podge in matte finish as
my sealer.  I let it dry overnight and it looks
pretty great!  I hope Grant likes it!


~ Peace and Personalized Canvas ~