Showing posts with label ornament. Show all posts

Tuesday, September 25, 2012

Personalized Family Ornament

I love making personalized ornaments!
 
 My favorite Christmastime activity
is going through my boxes of ornaments -
 
aw, who am I kidding?
 
My favorite activity is sitting in
front of the fireplace with a hot toddy
and the glow from a fully decorated,
lit Christmas tree in the background,
and the knowledge that all the empty boxes
have been stored away neatly.
 
 
Anyway!!  I love making personalized
ornaments and using them as gift tags on
wrapped packages.  For a change,
this ornament is specifically for hanging.
Well.  I guess you could still use
it as a gift tag ...
 
To make one hearth, you'll need a
3"x4" wood square and one jumbo craft stick.
 
 
I used three pre-cut wood stocking shapes
(you could probably fit five stockings
on the mantle if you don't mind them
hanging off the edges a bit).
 
 
And one Woodsies skinny stick,
rounded ends trimmed and cut into three
cuff lengths (I trim all my wood shapes
with Easy Cutter Ultimate from
Midwest Products).
 
Acrylic Paints:
 
 
These are the colors I used:
Hauser Light Green, Napa Red, Slate Gray,
Lamp Black, White, and Multi-Purpose sealer.
You'll also want a sanding block.
A permanent marking pen.
And a 6" length of ribbon for hanging.
 
Trim one rounded end off the jumbo
craft stick, and then cut a 4 1/2" length.


 Paint the jumbo craft stick and
the rectangle gray.
Paint the stockings green.
 
Allow paint to dry thoroughly,
then sand the edges lightly
with the sanding block.


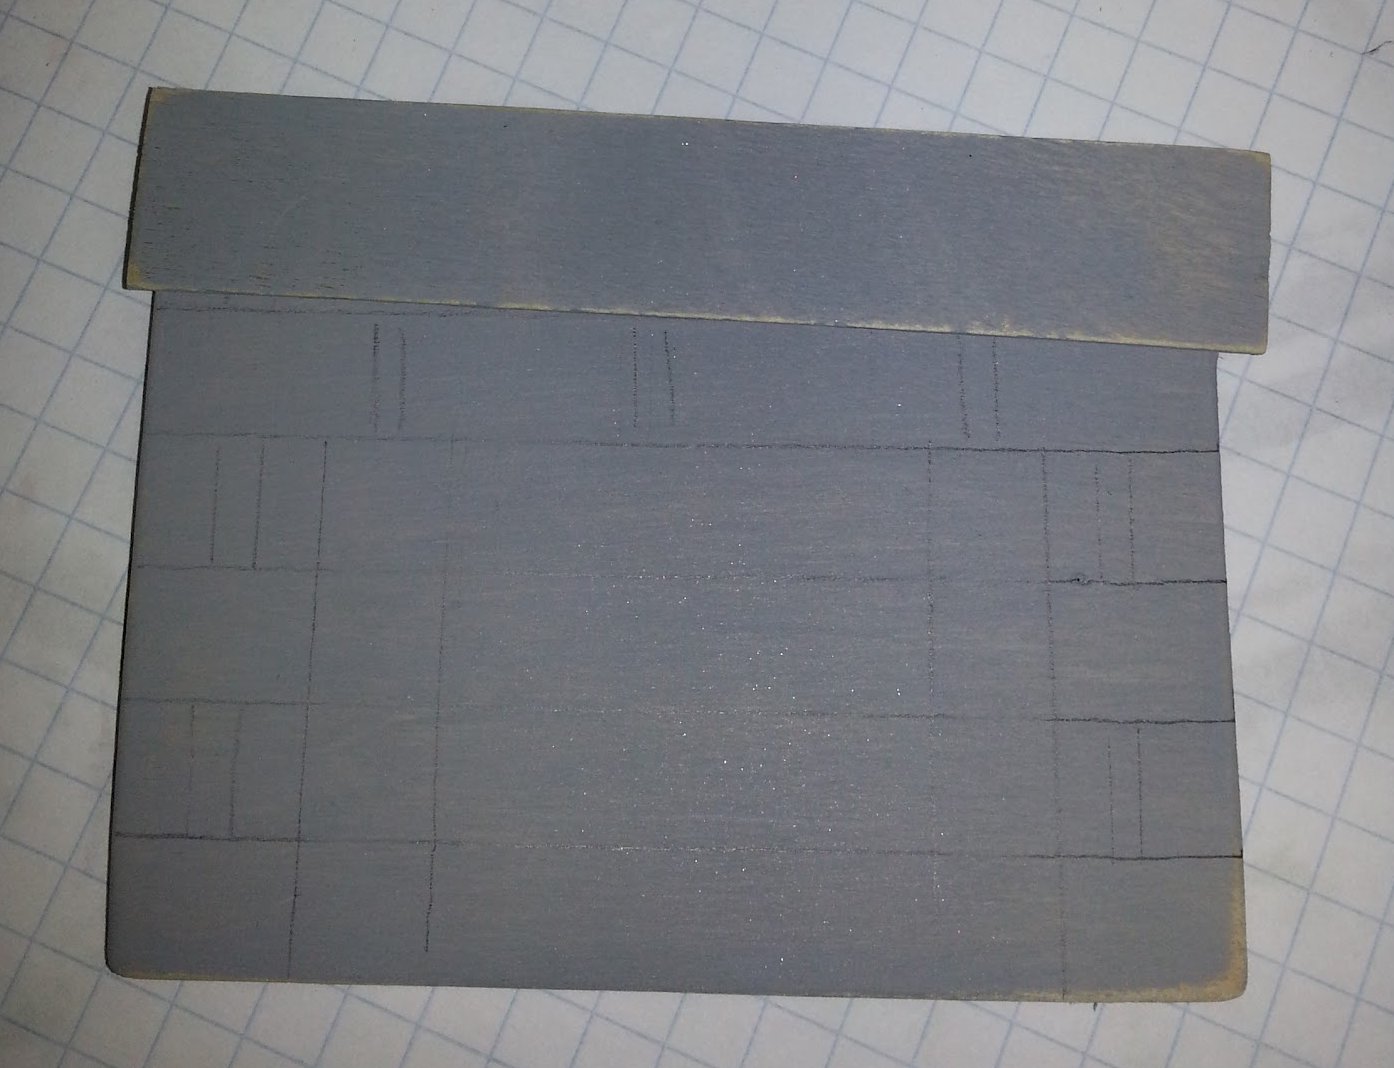
 I used a regular craft stick to measure
out straight lines, because crooked
lines really bug me.
:D


Then I blocked out a 2" square in the center
of the rectangle for the fireplace
opening.  I made a border around the
opening the same width as the craft stick.
 
 
Paint the square opening black,
and paint the bricks red.
(You don't have to be that neat ...
just get the basic brick shapes
in and leave a perimeter
of gray "mortar"):
 
 
Allow the paint to dry thoroughly,
then sand lightly with the sanding block.
Use a liner brush and white
paint to add details to the stockings.
 
 
Here's where I notice that not all my pics
uploaded from my phone to my
web album.  Actually, I noticed earlier,
when I wanted to post the pic I took
of all the wood pieces together.
 
Anyway, imagine you see the trimmed
skinny sticks painted white and sanded
lightly ... and then imagine you see
the pic I took of the cuffs actually
glued to the stockings.
 
 
 Seal each piece with Multi-Purpose sealer,
and allow to dry thoroughly.
Then use your pen to outline the
details, and write a name on each of
your stockings.
 
I used a thin red ribbon for
hanging ... I attached the ribbon by
putting a line of hot glue lengthwise
across the top of the rectangle where
the mantle will be, then secured
the ribbon by pressing the mantle in
place.  Sort of a ribbon sandwich,
if you will.  I used hot glue
to attach the stockings to the mantle.


From this ^
 
to this:
 
 
With just three or four photos
lost somewhere in cyberspace.
Hmm.
 
~Peace & Personalized Christmas Ornaments~

Saturday, September 15, 2012

Baby Jesus Ornament

This little craft is perfect for the
classroom - even the very young could
make these if you did a little
prep work ahead of time.
 You'll need the following supplies:
A 3/4" round head button plug,
a Woodsies giant oval,
a Woodsies small oval,
a scrap of gauze
(I had mine left over from Halloween)
acrylic paint: Flesh Tone, Marigold,
Extreme Glitter Gold, Multi-Purpose Sealer,
pink powder blush, a cotton swab,
a hot glue gun, glue sticks,
a permanent marking pen, a button, 
and a ribbon scrap.

Baby Jesus ornaments make me happy!
Here are two of my earlier designs:
  Hmm.  This one must be so old
I haven't even blogged about it.
I will put this on my To-Do List.  :)
Back to this year's ornament:
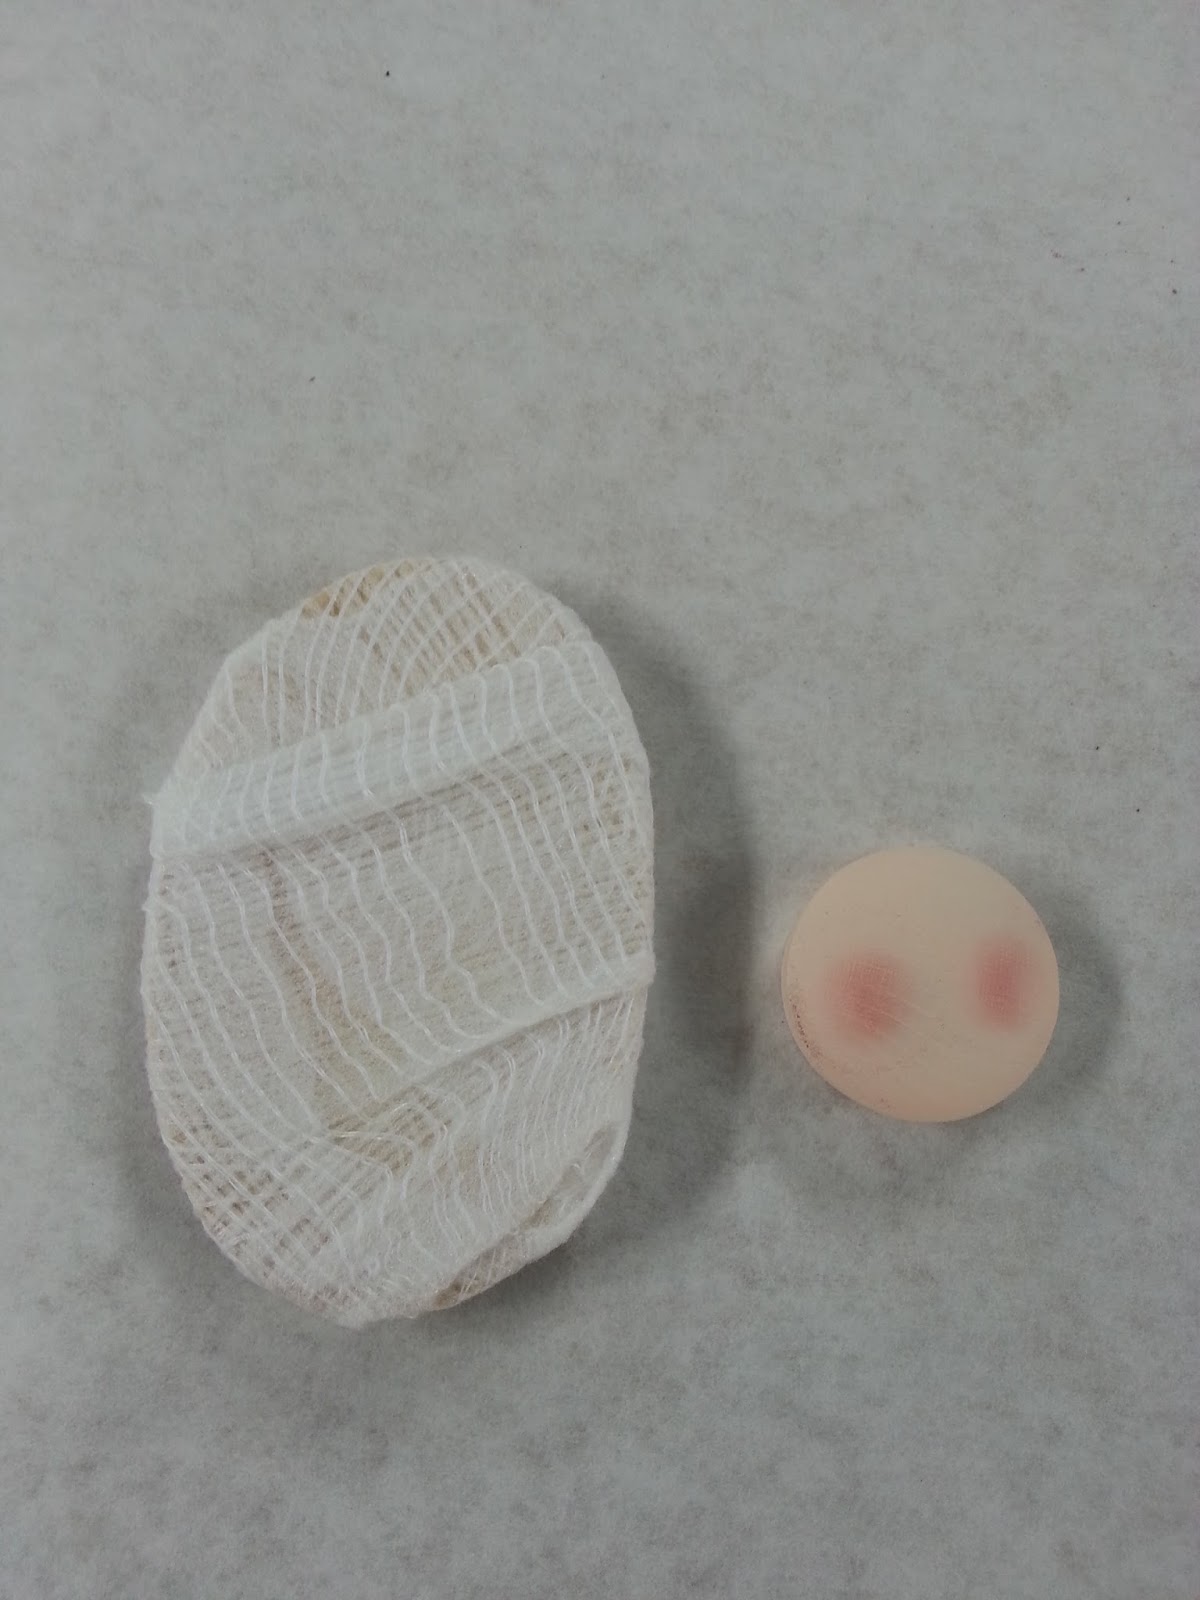
  Paint the button head Flesh Tone and allow
to dry thoroughly.  Blush the cheeks
with pink powder blush and a cotton swab.
Seal with Multi-Purpose Sealer.
Paint the small oval Marigold.
When dry, brush with Extreme Glitter Gold.
 
 
 Wrap the gauze scrap around the oval.
I found that really stretching the
gauze tightly and tucking in all loose ends
works the best.  Use hot glue
to secure the end of your gauze on the
back of the oval.
 
 Once your painted pieces are dry,
you're ready to assemble the ornament.
 
Put a small amount of hot glue on
the front bottom of the halo;
press the back of the gauze wrapped
oval to the front of the halo.
Flip ornament over.
Use a dot of hot glue to attach the
ribbon for hanging to the back of the halo.
For added support, I used a button
to sandwich the ribbon between
the oval and the button.
 
 
 This is what the front of your ornament
should look like.
Add closed eyelids by drawing two
"U" shapes with the pen.


I thought the ornament still needed
a little something, so I dug
through all my supplies until I found
this holly sprig.  I think I liked it because
it looked so much like my earlier
ornament where I painted the 
swaddling clothes and I painted the
holly sprig.  Any little decoration would
do ... a star, a heart, be creative.


~ Peace and Baby Jesus Ornaments ~

Wednesday, December 21, 2011

Woodsies(TM) Believe Sign


Okay, I'll admit it.
I'm a little obsessed with
Believe signs this year.  I've made
about three dozen.  Or so.

This one is super easy!!!


For each Believe sign,
you'll need one Woodsies(TM) wood slat,
acrylic paints in red, white, and two shades of
green ... and Extreme Glitter in Red.

A Crop-o-Dile or hand drill to
make holes in the corners of the sign for
hanging; craft wire for hanging,
and jingle bells or snowflake buttons
to accent the craft wire.


Base coat the wood slat with red.
Don't forget to paint the back and the sides.
I used a paint roller, because I made
twelve of these.

Paint the fronts of the slats with
Extreme Glitter in Red for extra glitz.


I taped off the top of each slat
with painters tape, and used a paintbrush
and green paint to make a stripe.
You could skip this step.


I wrote the word Believe on tracing paper
and transferred the word to each wood slat with
light colored transfer paper.


Use white acrylic paint and a round brush
to go over your pattern lines.


I decided to dot the "i" in Believe
with a sprig of holly leaves and berries.
I made a tiny pattern and transferred
the design directly over the "i"


Paint the holly leaves green.


Use a lighter shade of green
and a liner brush to outline the leaves.


Make holes in the top corners of the sign and
thread the wire through for hanging.
Before threading the wire through the
second hole, thread on jingle bells or snowflake
buttons for accents.  Then thread the
loose end of the wire through the second
hole and twist to secure.


Dot holly berries with bright red paint. 
Dot berries with white paint.
Coat sign with Multi-Purpose(TM) Sealer.


I didn't have my camera in my studio the day
I finished these signs, so I took
a pic with my phone.  I LOVE the way this looks!
It's my profile pic on fb and it's my
screensaver.  It makes me happy!!!


Use a black permanent marker to outline
the sign and the holly leaves.

Peace Out!!!

Beaded Snowmen


* Beaded Snowmen *

also previously referred to as the
particular ornament 
"specifically requested ... by my 11-year-old,
which would be difficult and time-consuming
to make for his 14 classmates"


Above photo is the beaded ornament
I made several years ago;
here is this year's Beaded Snowmen ornament:


 Here are the supplies you'll need for
each ornament:
three 5/8" wooden beads,
six buttons (3 red, 3 white)
tiny wreath ornament,
pink powder blush and a cotton swab,
acrylic paint in white and black,
Tulip Dimensional Paint in orange,
and an 18" length of craft wire.
An 1/8" dowel and a paint roller
to make painting the beads easier,
and a paintbrush and stylus
for touch-up painting and dip dots.


In order to paint these beads more
efficiently, I threaded them
onto a 1/8" dowel
and used a paint roller dipped in
white acrylic paint.


After I rolled several coats of paint
onto each bead, I used a paintbrush dipped
in white paint for the touch-ups
(the paint roller didn't reach the area of 
the bead nearest the holes)


Use the cotton swab to apply pink powder
blush to the cheeks of each
snowman bead.


Tape the dowels securely to the table
to make painting the details easier.
Dip the stylus into black paint
and dot the eyes and the mouths on
each of the snowman beads.


Use the Tulip Slick Dimensional Paint
in orange to apply the carrot noses.


To see step-by-step photos
of blushing the cheeks,
dotting the eyes and mouths, and
creating the dimensional noses,
click here.


Fold the 18" length of craft wire
in half around a paintbrush handle to create
a loop (do not twist to close ... yet)


Put the loop over the bottom
of the mini wreath ornament and twist the
ends to secure the wreath.
This will be your hanger.
Thread your beads and buttons
in the following order:
snowman bead, two buttons, snowman bead ...
alternating until you have an ornament
with three (or more) snowman beads
and a red and a white button
on the bottom.


Twist the ends of the wire to secure
the buttons and beads;
use the paintbrush handle to curl
each end of the wire into
a spiral curly cue.


Hang ... and Enjoy!!!
(NOTE: I used a small dot of
hot glue to attach each red button to
the snowman bead so the
heads wouldn't spin around).
On my old ornament, I painted a face
on both sides of the bead so
the extra glue wasn't necessary.


Peace and Beaded Snowmen!!!