
Here it is!
The first in a series of FIVE tutorials
for Quick and Easy Bazaar-Worthy Crafts!!!
Gingerbread Cutout Ornament

The Basics:
(what you'll need)
wooden gingerbread cutout with holes,

sanding block
acrylic paints: golden brown, chocolate brown,
antique white, country red, black,
and a multi-purpose sealer
specialty paints: Plaid Extreme Glitter - Red
pink powder blush, Plaid sponge stippler,
stylus to dot eyes, appropriate sized paintbrushes
(wash or sponge roller for base coating larger surfaces,
1/2" flat for base coating smaller surfaces,
script liner brush for details)
tooth brush and jumbo craft stick
(for spattering)
12" length of craft wire for hanger
Getting Started:
Keep in mind, it's just as Quick and Easy to make
a dozen or more ornaments as it is
to make one!

* Always Paint In Multiples *
that's my motto!
Apply a golden brown base coat:
If you're making several ornaments,
consider using a sponge roller to apply your
base coat. (Like the kind house painters
use when they're painting trim)
When dry, flip ornaments
over and base coat the backs, as well.
After allowing the paint to dry,
sand the sides of each ornament heavily,
and the fronts and backs lightly.
Acrylic paint raises the grain of the wood,
especially in these cutouts that are
much dryer (usually) than something you've just
cut with your scrollsaw.
You want to sand lightly on the front and back
to smooth the paint,
but you want to sand the sides
heavily enough to actually remove paint.

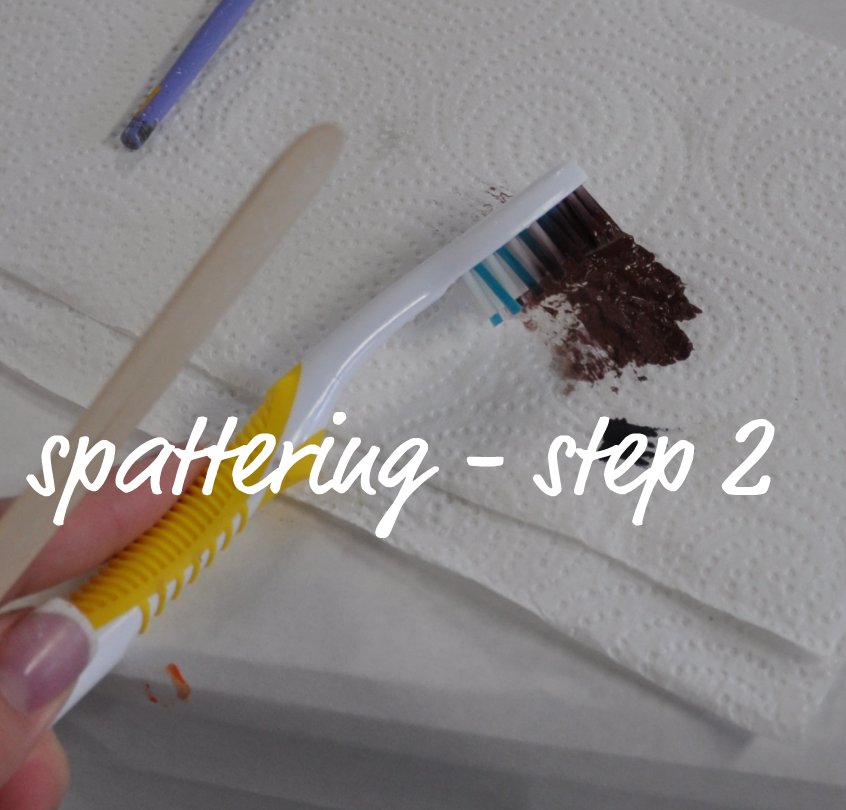
Paint spattering is a fun effect.
You can make a dark sky look starry,
or a village scene look snowy,
or - in this case - a wood cutout look
like a gingerbread cookie!!!
Pour a puddle of chocolate brown onto
a palette. Wet the bristles of an old scruffy
toothbrush and dip into the paint puddle.

IMPORTANT!
Blot the bristles on a dry paper towel-
we're just looking for a light
spattering of paint, not globby drops!

Holding the toothbrush horizontally
over your wood cutouts,
run the jumbo craft stick across the bristles
in the opposite direction of yourself,
unless you're looking to wear a spattered shirt.
(Yep. Learned this the hard way).

Next, use the sponge stippler
to blush the cheeks on each cutout.

The first in a series of FIVE tutorials
for Quick and Easy Bazaar-Worthy Crafts!!!
Gingerbread Cutout Ornament

The Basics:
(what you'll need)
wooden gingerbread cutout with holes,

sanding block
acrylic paints: golden brown, chocolate brown,
antique white, country red, black,
and a multi-purpose sealer
specialty paints: Plaid Extreme Glitter - Red
pink powder blush, Plaid sponge stippler,
stylus to dot eyes, appropriate sized paintbrushes
(wash or sponge roller for base coating larger surfaces,
1/2" flat for base coating smaller surfaces,
script liner brush for details)
tooth brush and jumbo craft stick
(for spattering)
12" length of craft wire for hanger
Getting Started:
Keep in mind, it's just as Quick and Easy to make
a dozen or more ornaments as it is
to make one!

* Always Paint In Multiples *
that's my motto!
Apply a golden brown base coat:
If you're making several ornaments,
consider using a sponge roller to apply your
base coat. (Like the kind house painters
use when they're painting trim)
When dry, flip ornaments
over and base coat the backs, as well.
After allowing the paint to dry,
sand the sides of each ornament heavily,
and the fronts and backs lightly.
Acrylic paint raises the grain of the wood,
especially in these cutouts that are
much dryer (usually) than something you've just
cut with your scrollsaw.
You want to sand lightly on the front and back
to smooth the paint,
but you want to sand the sides
heavily enough to actually remove paint.

Paint spattering is a fun effect.
You can make a dark sky look starry,
or a village scene look snowy,
or - in this case - a wood cutout look
like a gingerbread cookie!!!
Pour a puddle of chocolate brown onto
a palette. Wet the bristles of an old scruffy
toothbrush and dip into the paint puddle.

IMPORTANT!
Blot the bristles on a dry paper towel-
we're just looking for a light
spattering of paint, not globby drops!
Holding the toothbrush horizontally
over your wood cutouts,
run the jumbo craft stick across the bristles
in the opposite direction of yourself,
unless you're looking to wear a spattered shirt.
(Yep. Learned this the hard way).

Next, use the sponge stippler
to blush the cheeks on each cutout.

Swirl the stippler (or a cotton swab)
onto the powder blush,
and apply to the cutout in a circular motion.

To do this, dip a stylus into a puddle of black paint.
To make same-sized eyes,
re-dip the stylus each time you make a dot.
For one big and one small eye
(and this can be cute, too!!)
dip once into the paint and dot both
eyes one after the other.
The second dot will be smaller than the first.

Here's where we are so far:

Now let's add squiggly frosting!
Add a few drops of clean water
to a puddle of antique white paint to
create an ink-like consistency.
Turning the cutout as you go,
find a starting point and drag the liner brush
around the entire "cookie" in a squiggly
motion:

Finish up, then add a mouth:


Look at all these delicious cookies!
Yummers!!!

They still need a little "something"-
so let's add a heart:

Paint the hearts country red
and glue them to the front of the gingerbread.
When the glue is dry,
brush some Extreme Glitter over
the fronts of the hearts.
We can't tie them to a package
or hang them from the tree yet ... so
let's make a hanger.
Measure a 12" length of craft wire
and trim with wire snips.

Hold one end of the wire firmly
with the pliers, and
wrap the wire around the pliers
a few times to create a loop(y) knot:

Then thread the wire through one
hole in the gingerbread so that the loop knot
can be pressed flat against the
front of your cutout:

Next, wrap the center part of the wire
around a paintbrush handle.
Remove the paintbrush leaving a very
curly craft wire center.
(Note: the smaller the handle,
the tighter the curl.
Likewise, the fatter the handle,
the looser the curl).
;)

Thread other end of wire through
the second hole from back-to-front,
so that your final loop knot
can be pressed flat against the front
of the gingerbread cutout.


and ... VOILA!!!

Make one or make a dozen!
They are easy to personalize as well -
either on the front or on the back.
If you aren't comfortable
personalizing with a paintbrush,
use a permanent marker instead.

To make this variation,
use thinned paint in either
antique white or chocolate brown
and paint a criss-cross pattern to look
like plaid. Add a bow.
* peace and gingerbread *
2 comments:
This is such a cute gingerbread, I will certainly make a bunch of these for the tree and for my grandkids, thanks for the tutorial,
best wishes from Michelle
Thank you Michelle! I'd love to see a pic of your finished ornaments! Happy Painting!
Post a Comment