Happy Almost Valentine's Day!
I turned all this (^) into this (V) in just four hours!
(LOL!! I had actually planned to spend
a little time each day on these for a week - but
that old stomach virus foiled my plans!)
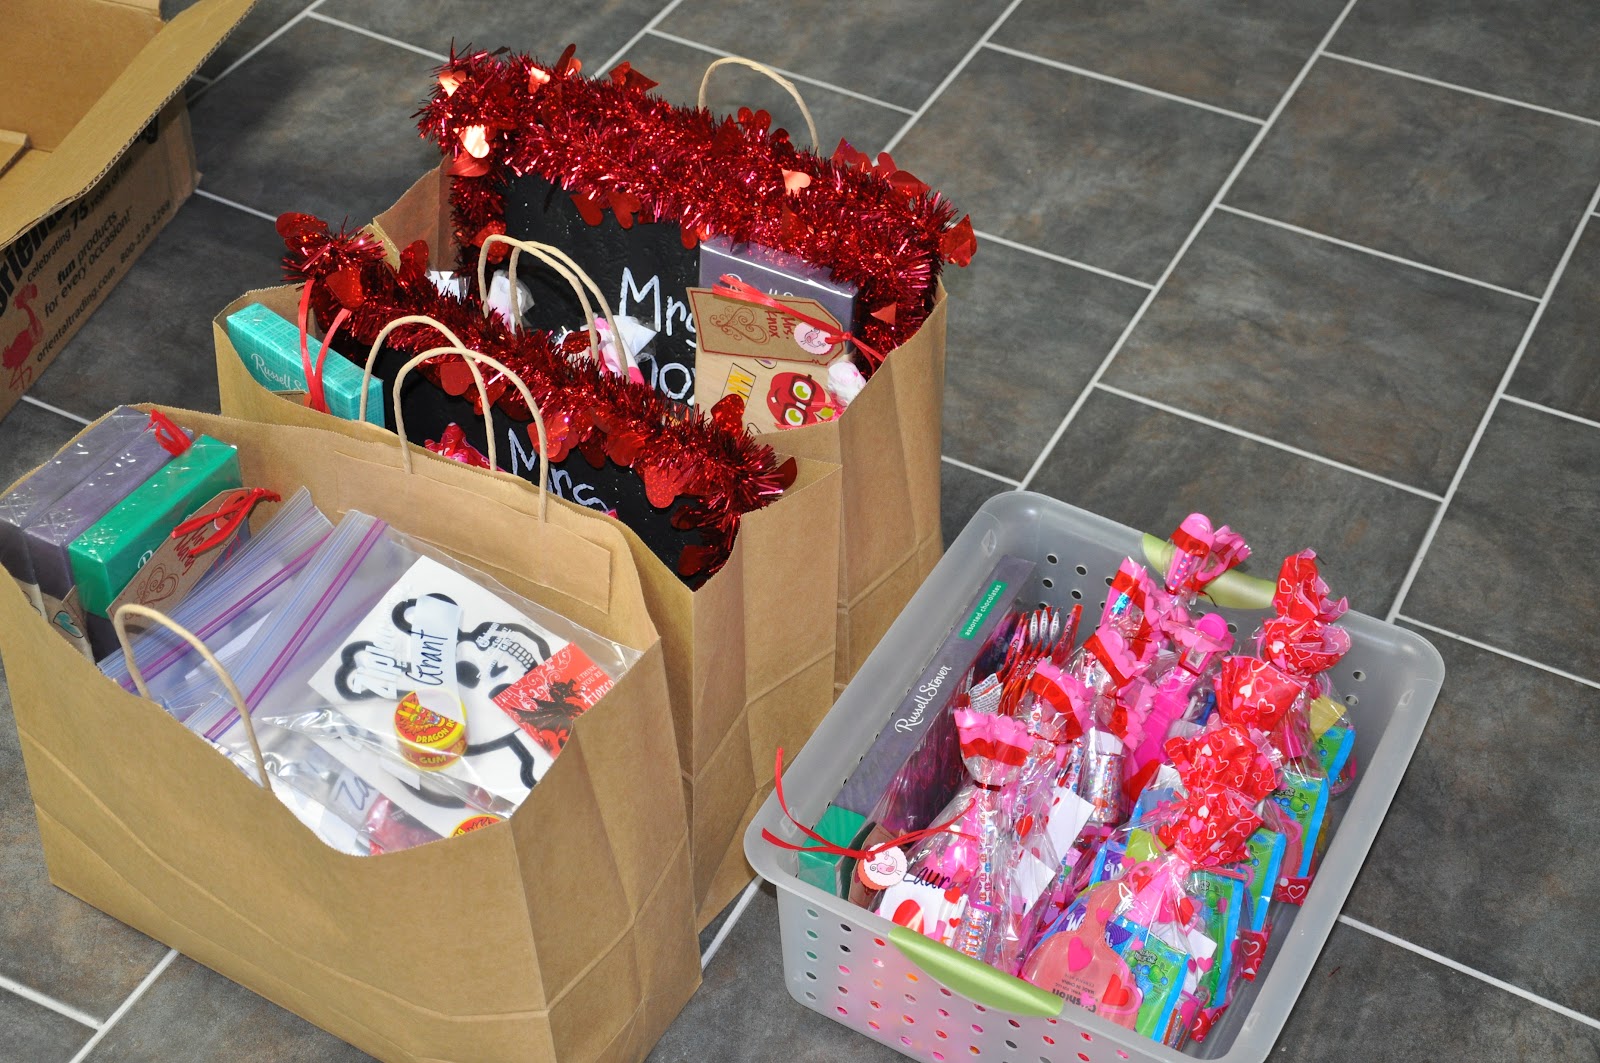
So ... I had to get 92 Valentines together
yesterday, for the kids' parties this afternoon.
I'll show you more detail, but first -
I have to brag on my crafty girlfriend for her
*ULTRA* Clever Valentine's Day Card Idea!!!
(soooo stinkin' clever!!)
I LOVE THIS!!!
And I also need to show you the
groovy Valentine Mailbox
she made from a race car shaped gift box:
We spiffed up the wheels a bit AFTER I took
this photo ... and then I didn't
remember to take another photo of the finished
box. Cuz that's how I roll.
I forget to remember things.
And then Crafty takes a super relaxing trip
over the weekend and I can't
dash over and take the pic I forgot to remember
to take after we spiffed up the wheels.
But, whatever.
CUTE, huh??
Anyway ... here are the ideas I put together
for my munchkins, please keep in mind these are only
slightly clever and shouldn't be categorized
with the ULTRA clever skunk and whoopie cushion idea
posted above. Also, because I had zero
intention of writing out 92 (that's ninety TWO)
To and From Valentines cards,
I cheated and ordered cards online.
I didn't even design my own. Sheesh.
What a cheat I am!!!
For my 13 year old boy,
the only suitable Valentine short of designing
my own (which again, I did NOT do)
was this groovy Dragon card.
The only suitable goody to go WITH the
groovy Dragon card, was the Chinese New Year
Dragon gum tape from OTC.
Even though said 13 year old boy wears
braces on his teeth, and cannot eat the treat
that goes along with his groovy Dragon card.
But I DID score these super cool dead head stickers!
What 13 year old boy wouldn't want
THIS stuck on his school notebook?? Huh?? I ask you!!
But then I realized the super cool dead head
stickers would not fit into ANY of the SIX treat bag
packages that I had picked up for treats.
So ... I compromised (time was running out and
I still had 77 more Valentine goody bags to make):
I stuck them in freezer bags.
Ugh!! I'm sorry Brady!!!
But I did put lots of candy in there, too:
And the boy CAN eat the fun dip and the
gummy hearts and the suckers.
And he can play with the super sticky gel
hearts on a string which I think are
disgusting, but boys seem to love them.
eew
Next up: my 11 year old creature-lover
chose the shark card:
I found shark squirters and gummy sharks
and lots of un-shark-related candy
to put into his goody bags.
My 7 year old boy is an astronaut
in his version of the Valentine card, and I
found the create-a-space-scene
sticker cards to go along with his theme.
Also, lots of tiny trinkets and yummy candy
and disgusting super sticky gel hearts on a string.
Now, my 9 year old girl was a tiny
bit more particular.
For instance, she wanted boy and girl treat
bags to be separated and filled with different treats.
I don't know where she gets her creativity.
(hee hee)
Her little Valentines are dancers,
and they include her photo on the inside.
For our competition dance girls,
we bought 7" ballet fairies and candies,
and put them in the fun zebra treat bags:
Then for her classmates,
everyone got the same candies, but the
girls got a bendable ballerina doll and a token
bling ring (in tiny sizes! so cute)
and the boys got WHOOPIE CUSHIONS
because what 7 year old boy doesn't need one
of those to play with for three minutes
until they pop? Huh?? I ask you!!!
And then I cheated (again!) and bought the
teachers a box of candy instead of
painting a super cute container and filling
it with clever theme-related gifts.
But, remember! I did paint little
Valentines "chalk boards" for them, so I get
a little credit for that.
Of course, as it happens, I forgot to remember
to put the hanger on the back of
one of the teacher's "chalk boards"
(made from a ceiling tile - see previous post!)
so now I have to run back out to the
studio and hopefully remember that I'm there
because I forgot to remember to glue
the hanger to the back of the "chalk board" so
that I can get that done and get it to school.
Hopefully in time for the Valentines party,
but at this point, just getting it there today would
make me happy.
I did make quick little gift tags for the boxes
of candy - just to personalize them
a tiny bit. I asked Crafty Girlfriend to cut
me some tag shapes from Kraft cardstock and her
Cricut machine. Then I stamped a groovy
heart at the bottom, and cut some circles out of
colored paper. I stamped those with tiny
stamps and chalked them in.
Talk about a craft fail!
I've had the chalks for years, but just
pulled the wrapper off yesterday.
I couldn't get good coverage with the tiny
applicators so I wet a brush.
A Big Fat WHATEVER because that didn't
work. And I didn't want to paint them.
~And for the record, it's okay that I can't chalk.
I mean, I'M okay with it.
Or maybe not. I will tackle it again,
but first I will do some research.
Just not right now.~
I don't remember how many goody bags I still
had left to make, so I just did this:
Strung them all together and attached them
to the Kraft tag and wrote the teacher's name
with a permanent marker.
And in case you're wondering,
NO, I did not get the hole punched in the
right place on this particular red circle tag,
and NO I did not fix it.
I'm giving it to her just like this.
I am.
Unless I decide to run out to the studio
and fix it. Because I'm OCD like that.
Sheesh.
HAPPY VALENTINE'S DAY!!!
I hope this post was mildly inspiring at
least, and WILDLY inspiring at best!!!
Peace and May You Be Wildly Inspired!!!