Showing posts with label Spring. Show all posts

Friday, April 6, 2012

Spring Basket Pokes

Happy Spring!!


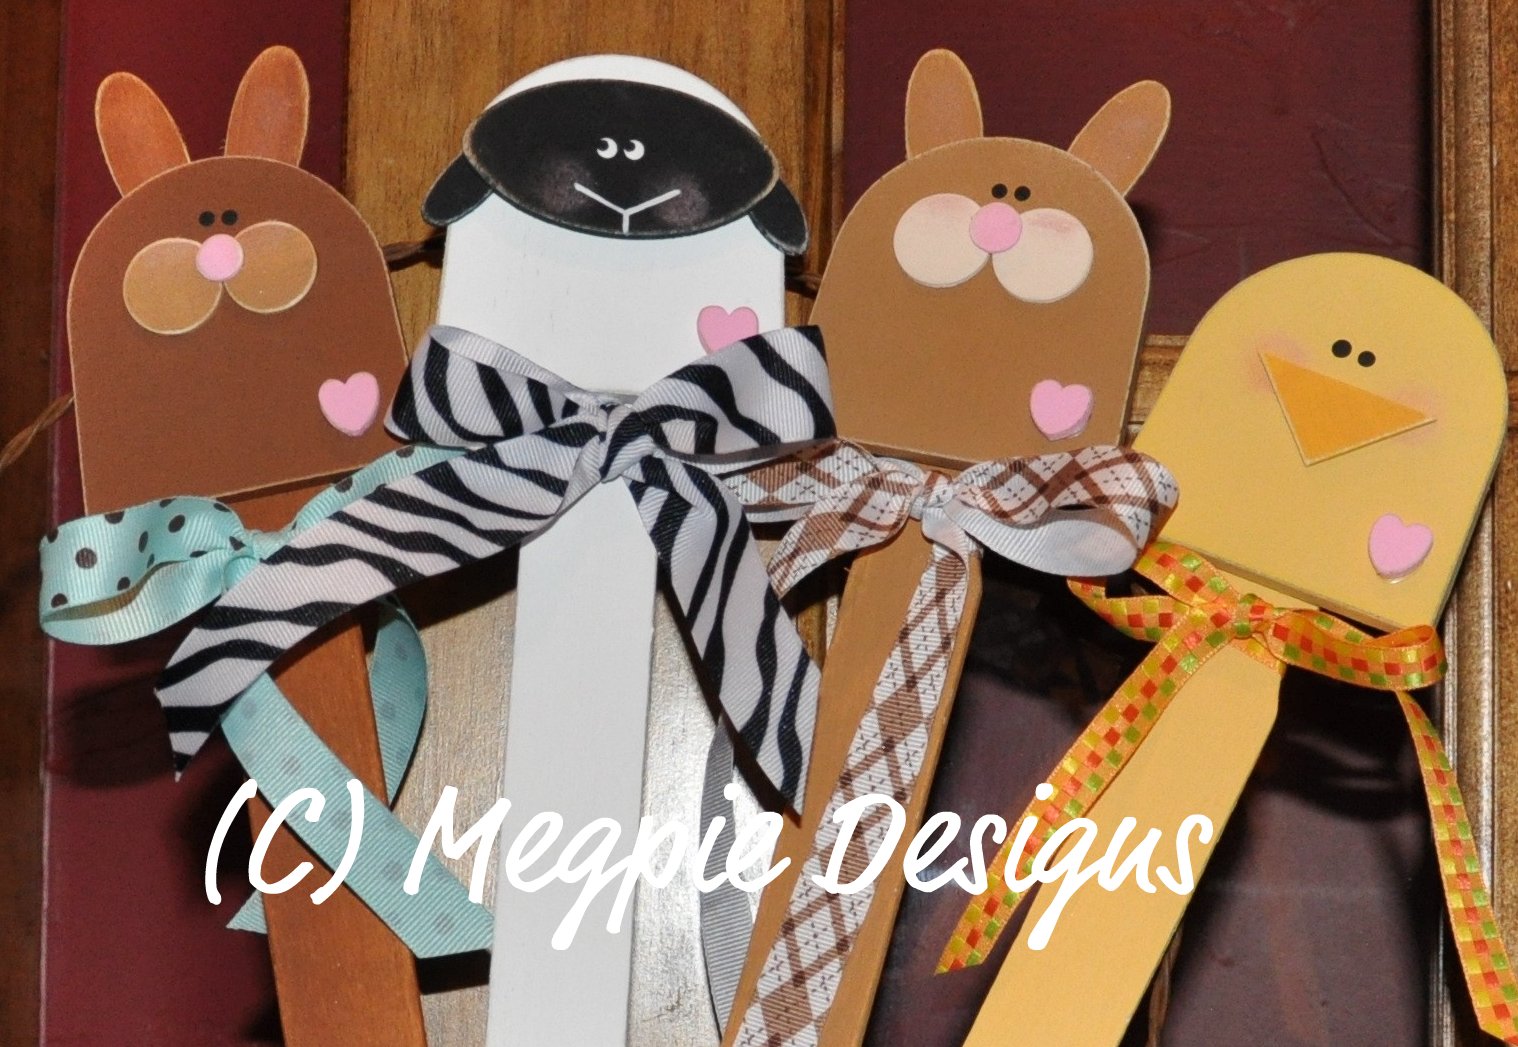
I've made these cute paint stick pokes
for today's Blog Hop -
using paint sticks and pre-cut wooden shapes!
Check out more Spring crafts
by clicking on the Designer Crafts blinkie
to the right of this post!!


Here's what you'll need to make the chick:


 Paint the beak marigold and the body
lemon yellow.  Sand edges with a sanding block.
Paint the stick lemon yellow. 


 Blush cheeks with pink powder blush
and a cotton swab:


 Use Aleene's Tacky Glue to attach beak.
Eyes are dip dots of black.


Attach body to the paint stick with
Aleene's Tacky Glue.
Tie coordinating ribbon around the neck.


I added a light pink wooden heart
just for character.


 These are the wooden shapes you'll
need to make the lamb.


 Paint the ears and face black.
Paint the body white.
Sand the edges with a sanding block.


Blush the cheeks with pink powder blush.
Eyes are dip dots of white, then smaller dip dots
of black.  Attach pieces with
Aleene's Tacky Glue.


Attach body to paint stick.
Tie coordinating ribbon around the neck.


Here are the shapes you'll need
to make the bunnies:


Paint body and ears brown.
Paint muzzle with a lighter shade of
brown, and nose is pink.


Blush tops of muzzle with
pink powder blush and a cotton swab.
Blush inside of ears with
the pink powder blush, as well.


Sand edges of wood with sanding block.


Attach pieces with Aleene's Tacky Glue.
Eyes are dip dots of black.
Tie coordinating ribbon around the neck.


I can't wait to poke these in the kids'
Easter baskets!!


Peace and Spring Critter Pokes

Sunday, March 13, 2011

Designer Crafts - Wedding

My wedding inspired craft:

DSC_1548 by megpie.design
DSC_1548 a photo by megpie.design on Flickr.

A tiny, feathered bride and groom ...
painted on tiny canvases
and perched on tiny easels!


Thursday, November 18, 2010

Sizzix Blog Hop - Flower, Beauty Bloom


I know it's supposed to be a flower,
but once I had all my pre-cut pieces spread out,
my mind couldn't see past the duck!


I started with an unfinished wood frame.


After base coating the frame blue, I found coordinating
ric rack to glue around the edges.


Rather than a photo, I used fabric in the frame opening.


A little bling ... a little Extreme Glitter ...
and it's a Duck Frame!

Peace!

Thursday, September 30, 2010

Sneaky Peeky!! - Nut Goody Jars


Sneak Peek!  

This is one example of the recycled containers I'm working on for food gifts.  The detailed how-to instructions, patterns, and artist tips will be in the Spring (March/April) issue of Crafts n Things. 

I will repost then with step-by-step photos.
I'm not allowed to post them now ... something about death or lawsuits?  Or maybe, that's just cheating.  At any rate,
I would like to share some tried and true tips on how to clean the jars for painting.  No harm there, I'd say. 

 First, rinse the jars and lids and remove the labels and glue.  Soaking in hot water helps soften the glue, and the really sticky stuff can be removed with Goo Gone.  Wash them with hot soapy water.

Use rubbing alcohol to remove any ink stamped onto the glass.  Believe it or not, those tiny stamps can come back to haunt you!  They'll bleed right through your paint.
I always wipe the jars and lids down with a 1:1 mix of vinegar and water.  This removes the oils from the surfaces so the paint will stick.


Seal the jars using a sponge brush and a multi-purpose sealer.
(I like DecoArt(R) Multi-Purpose(TM) Sealer - I've been using it for years.  YEARS, I tell you).


Tape off the tops of the jars.  You don't want to get any paint into the threads on the jars, since you'll be using these for food.  Apply several light coats of acrylic paint, allowing plenty of drying time between coats.  Several light coats are better than one thick coat!
(Chew must tvust me on zis, Grasshoppa!)


All righty!!  That should get you started.

Remember to save your cans and jars!  I have boxes full and they've saved my life a few times.  They don't wear a cape and swoop down from a tall building and scoop me away from the purse-snatcher, but almost!  I can paint a gift can up pretty quick and they make great last minute gifts for hostesses, teachers, co-workers and friends.

I'm hoping to work on Christmas designs next week!  I've got some goody container ideas I'll share, some fun painted picture frames, and the ornament designs I'd like to work on.  I love Christmas ornaments ... especially the simple ones.  Every year, I make each student in my kids' classes a homemade ornament ... I'm thinking this year I'll use mini chalkboards as my surface.  I'll dig some out from years past and post a pic.  

Oh yes ... of course, I'll have to paint eighty of them.  Yikes!
Happy Thursday!