Showing posts with label Bling. Show all posts

Monday, April 1, 2013

DCC Blog Hop - Handmade Flowers!


April's theme is
~ Handmade Flowers ~
and as an additional challenge,
handmade flowers using items found
in or around the house.


Four growing children means I have
a plethora of outgrown clothing
at any given time.  I thought this challenge
would be the perfect time to use
that pair of old jeans I'd set aside!


 Supplies Needed:
old jeans ~ scissors ~ needle and thread
paintbrush ~ permanent marker ~
~ assorted buttons ~
~ green tulle ~ flower stencil or cookie cutter ~
~ DecoArt SoSoft Fabric Paint ~
~ DecoArt Glamour Dust
Ultra Fine Glitter Paint in Ice Crystal ~
~ Swarovski Crystals ~ E6000 ~


 First, cut along the seams on one leg
of the jeans.


 Use a flower stencil or cookie cutter to
outline flower shapes onto
your piece of denim fabric.


Cut out the flower shapes.


Choose several colors of
DecoArt SoSoft fabric paint.


Apply two coats of fabric paint
to each flower cut out.


 Apply glitter topcoat and
allow pieces to dry thoroughly.


Next, gather the fabric in the center
of the flower cut out
and stitch a button on to secure the fold.


Attach three buttons to the center
of each flower cut out.


~ Repeat for other cut outs! ~
Attach flowers to jacket or vest
for a little added pizazz! 
Hide your stitches behind the buttons.


Cut a length of tulle into a square.


Fold in half diagonally into a triangle,
then continue to fold and gather into a leaf shape.


Tuck tulle "leaves" behind the flowers
and secure with needle and thread.


Additionally, I used a single stitch
here and there to tack down
the flowers so they wouldn't curl.


 Attach Swarovski crystals to the
center threads of each button
with E6000 adhesive.


I added Swarovski crystals to the
center of each of the metal buttons
on the denim vest, just
for kicks.  And because the game was on
and I needed some busy work to do.


I enjoyed this challenge ~
I love that I was able to create something
fun and simple with items
I already had around the house!
Cost?  Zero!! :)

~ Peace and Happy "Recycling" ~

Wednesday, September 12, 2012

Halloween (or not!) Skull Magnets

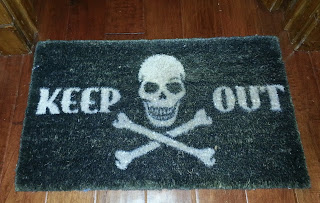
Who says skeletons are just for Halloween??
I keep this in front of the boys'
bedroom all year 'round:


You can turn a wooden circle cutout
into a spooky skull magnet!!
And, you can keep it around for the
rest of the year.  Especially if
you're a teenage boy.
Or a pre-teenage boy.
Of which I have a few.
Just sayin'.


I have a house full of boys.
The boys have lockers at school.
These school lockers need
groovy magnets to hold up class
schedules, phone numbers, and
other important information.

(Sometimes I employ the "don't ask,
don't tell" tactic.  This may
or may not be one of those times).


I thought it would be fun
to make some "Halloween" magnets
for their lockers ... and the
Jolly Roger seemed just right
for boys.


For each magnet, you will need
a Woodsies(TM) Jumbo circle
cutout, a large (1/2") circle magnet,
acrylic paints in black, white, gel stain,
One Step Crackle finish, and
clear gloss varnish.
You will also want two sizes of
paint brush (a large flat or wash
brush to base coat and seal, and a fine
detail brush for the skull and bones),
a sanding block, a clean rag, some
crafting glue, and
one tiny acrylic stone.


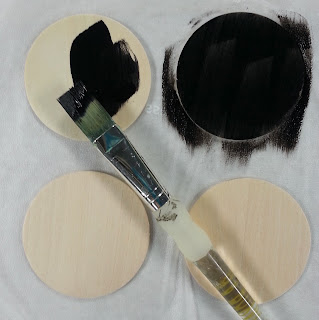
Base coat the front, back, and sides
of each circle with black paint.
Here's a tip:


Use a sanding block to remove the
paint from the edges of the circle.
 Apply main pattern lines with
light colored transfer paper and a stylus.


Paint the skull and the bones
with white (or cream) paint.


I couldn't decide whether to
go with a white or a cream color
paint for the Jolly Roger.  I know which I like
better now that I'm finished ...
let me know what you think!


Once the paint was dry,
I used a white eraser to remove
all transfer paper lines.


 I brushed on a thick coat of
One Step Crackle paint and allowed
the pieces to dry thoroughly.


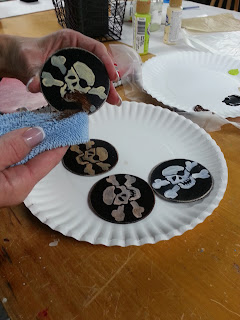
Next, I wiped a small amount
of Gel Stain onto the front of each
circle with a corner of my rag.  Then I wiped off
the Gel Stain with a (different)
cornerof my rag.


Finally, I brushed on a coat of
Multi-Purpose Sealer.
I (photographed my child using)
a hot glue gun to apply
the magnets to the back 
of each wood circle.

Mainly because she begged,
but also because it's really
difficult (read: impossible) to
hold the glue gun, the wood piece,
and the camera all at once.
Unless I somehow wedge the camera
under my chin.  But then I
can't see nor can I press the button.
So it just made sense
to let her glue for me.  I love helpers!!


 and I attached
the tiny acrylic stone with
Aleene's Tacky Glue
and a toothpick.


I think the stone makes it awesome!
The glue dries clear, btw.
I hadn't made enough of these
initially and had to dash
back out to the studio after dinner and whip
up a few more.  Somehow I didn't
get a final pic of the magnet.

Good mom that I am,
I have already texted each boy
and requested they take a photo of
their magnets for me.
I figured, even if they don't get the
texts during the school day,
surely (at least one of them)
will be checking his phone immediately
after school, leaving him
enough time to dash back to his
locker and take a picture.
For me.
Mom.
Because I forgot.
Because that's just how I roll.
Remember??


~ Peace and Jolly Roger Magnets ~


Wednesday, March 28, 2012

Fancy Flower Hair Clips

I've gotten a couple of requests
to post a tutorial about making these flower
hair clips all the little girls are wearing:


The technique is very simple,
but please excuse the fact that my photos
come from several different projects.


I have lots of photos.
Lots and Lots of Photos.


I weeded through them and pulled these
out for this tutorial:
You will need your adhesive of choice
(I have used hot glue and E6000 - they both work)


When I first started making these, I used
 the daisies on a long plastic stem found in the
floral department of my craft store.
Now they're selling just the daisy tops:


You will also need a large acrylic gemstone
for the center of the hair accessory,
and an alligator clip to attach the flower to.


Pull the flocked plastic center of the flower
off of the plastic stem and
separate the flower layers.


I like to buy two different colored daisies
and alternate the layers:


 You want to glue each layer
to the layer beneath it - securely -
with either the hot glue or the E6000.
Just glue the centers -
you want the petals to be loosey goosey.


Attach the acrylic gemstone to the center
of the flowers with either glue.


Glue to alligator clip to the back
center of the flower.


For a more finished look,
you can glue a strip of grosgrain
ribbon to the top part of the alligator clip
before attaching it to the flower.


 And there you go!
Quick and Easy!!

Now I need to make something
super fun and crafty
to hang all these beautiful hairbows from!

Peace and Fancy Flowers

Thursday, March 1, 2012

Ceiling Tile Wall Art

Ahh ... birthdays.
My eleven-year-old has one coming
up soon.  Too soon.
But this gift is for this weekend:
(and it isn't for my son)


I showed it to my eleven-year-old after school.
He looked at it.
He looked at me.
He said, "well ... I don't like it,
but I think Mariah will."


Ahh ... eleven-year-old boys.


 This took me two hours to make.
I know, because my seven-year-old was
spending the day with me in the barn, and
he timed me.  We got there at 12:40pm and we
left at 2:40pm.  So, two hours -
including complete set-up, clean-up, and
entertaining the seven-year-old.


I used a 12" square commercial ceiling tile,
a stencil, a feather boa, and some bling.
Also acrylic paints and glittery sealer - for added glitz.


First, I squeezed two shades of pink paint
onto a foam plate, and I used a
paint roller to base coat the ceiling tile.


That part was so easy, a seven-year-old
could do it!  With one hand!!  While eating a sucker!!!


Next, I isolated the design on the stencil
I wanted to use with tape.
I put a small amount of white paint
on the plate, dipped the tip of the stencil brush
into the paint, and ...


... and this is the most important thing
to remember when stenciling:


wipe off nearly all the paint
by swirling the brush onto a clean,
dry paper towel.


Trust me ... 
swirl and swirl and swirl until
you think you have no paint left in the
bristles, and then I promise you,
it's probably still too much paint.


Holding the brush perpendicular to the
stencil/surface, pounce lightly until the paint
transfers to your surface.


Too much paint will bleed under the edges
of your stencil, and you won't
have a sharp, clean design when you're
finished stenciling.


Remove the stencil slowly:


Isolate the second swirl for the upper right
corner of the ceiling tile,
and stencil in the same manner.


Remember to swirl most of the paint
off of the brush onto the paper towel before
applying it to your stencil.


To add interest to the main design,
which is going to be the child's name
across the center of the tile,
I decided to lightly stencil a motif in the middle.


Next, I made a pattern on tracing paper.


After aligning my pattern on the center
of the ceiling tile, I taped
the pattern in place so it wouldn't shift
as I transferred the letters.


I slid a piece of transfer paper
between the ceiling tile and the pattern,
and traced over the lines lightly
with a stylus.


Checking in with my seven-year-old -
he wanted to paint a dinosaur.

Blue.
With flames on its body.
And red spots.


I used my favorite paintbrush and a darker
pink paint to go over the name.


Then I used my darkest shade of pink paint
and a liner brush to go over the
left and lower sides of each letter,
just to give them some depth.


I cleaned up my edges using a liner brush
and the lightest shade of pink paint.

Then I added three dip-dots to the tips
of the two corner designs,
and painted the entire thing with a
generous coat of Starlite Glitter.


I checked back in with my painter.
It was slow going over there.
He was being extra careful to paint
the entire thing blue.


I used a hot glue gun to attach a sawtooth
hanger to the back of the tile.


I noticed that the glue gun was so hot,
it was literally burning my glue
to a dark brown color.


Eeeewww!!!


I decided I didn't like this,
so I had to ... sadly ... part with this
particular glue gun.
I threw it away.  It hurt.  A little.


But it's okay.  I have others.
Many, many others.


Please note the beautiful
bracelet that my seven-year-old
made for me today.
I promised never to take it off.

With a different glue gun and some
fresh glue, I attached the
feather boa all around the outside edges
of the ceiling tile.


It looked like this.


Then, I added some bling here and there:


And now it looks like this!


and the dinosaur??


 Well, it ain't your average dinosaur !!!
Or maybe it is ... we don't really
know for certain, do we??


Peace and Blue Dinosaurs