Okay, so most of you already know
that I LOVE Baby Jesus
Christmas ornaments ... after all,
He IS the Reason
for the Christmas Season!!

This ornament is very simple to paint.
Basic painting skills -
base coating, shading, and a
little detail work with your liner brush.
(Actually, you don't even have to
add the detail work,
you could add another wood shape
like a star or a heart)
Start with these wood shapes:

A 2 1/2" Egg/Oval Cutout,
a 3/4" Roundhead Plug,
(both available at craftparts.com)
and a 1" circle cutout.
(I buy circles in bulk -
I especially like Forster(R) Woodsies(TM)
In addition to these shapes, you will
need a 1/4" screw eye, ribbon
for hanging, a permanent marker,
a sanding block, and acrylic paints:
White, Black, Antique Gold, Green, Red,
Flesh, and a Sealer.
I added Extreme Glitter to the
Gold and the Red pieces -
everything's better with sparkle!!
I added Extreme Glitter to the
Gold and the Red pieces -
everything's better with sparkle!!

Base coat the shapes as follows:
Egg/Oval (Body) - White
3/4" Plug (Face) - Flesh
1" Circle (Halo) - Antique Gold

Allow the paint to dry thoroughly,
then lightly sand the edges
of each wood shape.
Brush Extreme Glitter Gold
onto each halo.
Brush Extreme Glitter Gold
onto each halo.

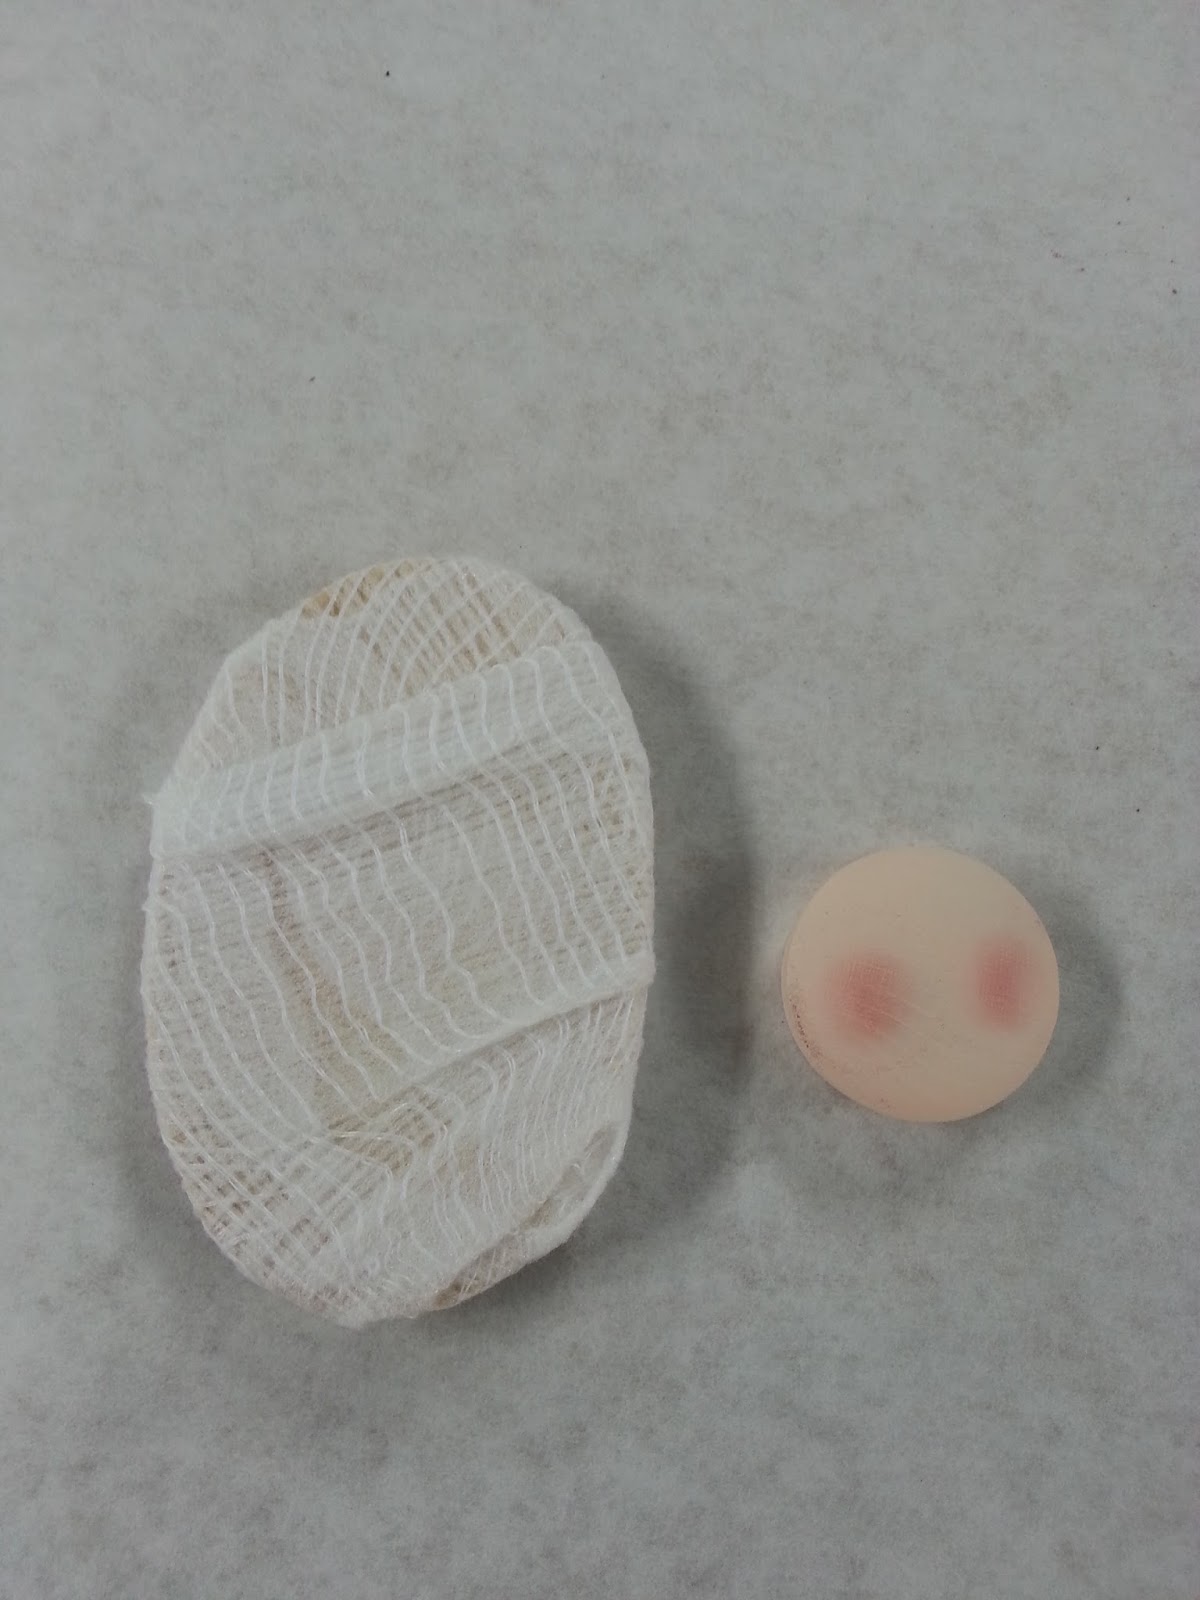
Blush Baby Jesus' cheeks with
pink powder blush and a cotton swab.

Hey, as long as you have all the supplies out
to make one Baby Jesus ornament,
why not make ten??

Brush clear sealer over the painted,
blushed plugs. This will keep your blushed
cheeks from losing their rosiness.
Also seal the halos at this point.

I use a Fiskars hand drill to make a starter
hole in my painted egg. This helps
when you have ginormous hands like I do,
and you have to hold a tiny screw eye
between two extra-large fingers,
while simultaneously
holding an egg cutout in the other
hand and twisting.
Just sayin'.

This is as far as I get that tiny screw eye
in before I pick up my pliers
to finish the job.
I don't even twist the pliers,
I hold them still and twist the egg.

If only I had a helper to hold the camera
while I do this. I think it would
be comical to watch. I noticed today that
I had to pick up the screw eye with one hand,
and literally put it between the
two extra-large fingers of my other hand.
Weird, huh??
And someone had the ingenious idea
of slightly magnetizing the
tips of the pliers. Knuckle Touch!!
And someone had the ingenious idea
of slightly magnetizing the
tips of the pliers. Knuckle Touch!!

Use a 1/4" flat brush to shade
around the "folds" in Baby Jesus'
swaddling clothes.
First, make a small puddle of Antique Gold
paint. Dip just the corner of a damp
(and blotted) brush into the paint puddle.

Stroke the brush back and forth about
six times to distribute the paint
along the bristles. The paint will be more
concentrated on one end, and
gradually fade across the bristles.

Imagine Baby Jesus' head at the top of
your egg shape, and start your
shading below and to the left of His head.
Pull your brush down (as shown).

Repeat for the second fold.
You may have to reload your brush.
NOTE: I completely rinse and then blot my
brush bristles before reloading.
This keeps your shading clean.

Repeat ten times. (ha!)

Next, I made a pattern of holly leaves
and berries ...

design to some of my ornaments
using transfer paper and a stylus.


Paint the leaves Green and
the berries are dip dots of Red.


Once the holly berries are completely
dry, seal the egg shapes.
I chose two sizes each of a heart
and a star cutout:

So you can see what Baby Jesus would
look like if you chose to use
one of these instead of painting
holly leaves and berries.
Base coat the star(s) Antique Gold,
and the heart(s) Red.
Sand the edges to remove
some of the paint.

Apply Extreme Glitter in Gold
to the stars, and Extreme Glitter in Red
to the hearts.

Seal each piece with Sealer and
allow to dry thoroughly before assembly.

Thread a ribbon through the screw eye,
then use hot glue to attach
the halo to the back of the egg shape,
and the face to the front of
the egg shape.
The eyes are dip dots of black.
Once completely dry, use the
permanent marker to outline the details.

I like the painted holly myself,
but if I were making nine dozen of these?
I'd be using either the heart or
the star cutout. Fer sher.
~Peace and He's the Reason!!!!~