Showing posts with label Season. Show all posts

Thursday, October 3, 2013

Rustic Wreath


All Free Christmas Crafts
has a new Wreath eBook!
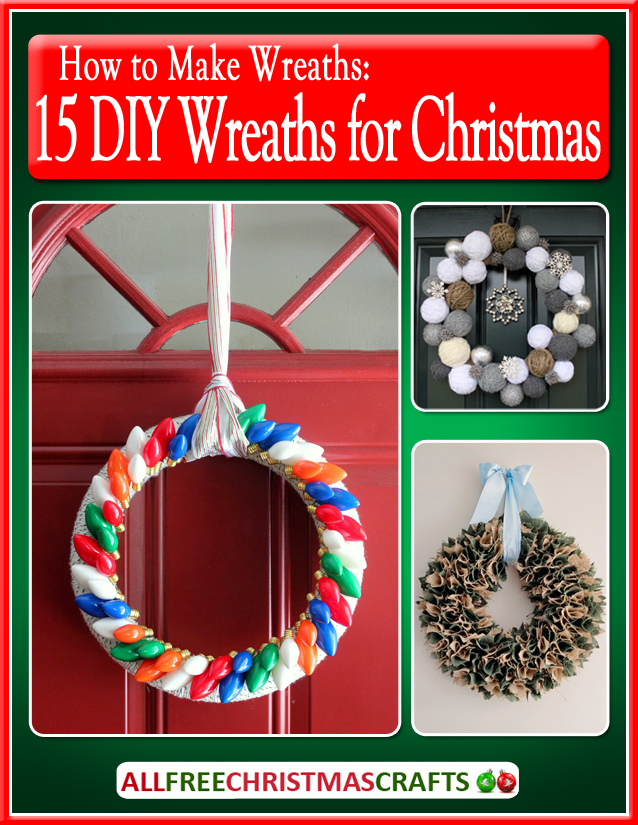
Free Wreath eBook!


Just click here to download your copy.

Here's a repost of my featured
Rustic Cardinal Wreath:
Thanksgiving is at my house (again) this year ...
I've made all my guests a family initial
cardinal wreath.
(I'm also making these for teacher's gifts!)

So simple ... here's what I did:


Supplies:
10" Grapevine Wreath, 4" Gold Initial, Bird's Nest Pick,
Floral Pick (evergreen, pine cones, berries),
Cardinal with alligator clip,
20 gauge crafting wire, wire snips
needle nose pliers (to help with tightening wire)
hot glue gun


First, cut a 12" length of craft wire
and wrap it two or three times around the initial.


Attach it to the side of the wreath.
You may have to turn the wreath a few times
to determine the best place for the 
initial.  The thinnest spot works best.


Turn the wreath over and twist the wire ends
together to secure the initial.


Poke the bird's nest pick into the wreath near
the top of the initial.
Poke the sprigs into the wreath.
Secure with crafting wire and/or hot glue.


Clip the cardinal near his nest ... and there it is!


Quick and easy!  A nice take-home favor
on Thanksgiving Day.

~ Peace!!! ~

Monday, October 22, 2012

Happy Witch Door Greeter

Oh, my gosh! I have been painting up a storm
and I have soooo many projects to share with you!!!

I'm currently working on about twenty-five
projects ... simultaneously.  Which means I'm jonesing
for my immediate gratification!!  A day (or even
two) may pass without my completing a single project,
and then ... voila!!  Twenty-five projects completed at once.

Anyway ... this project is something I decided
to make WHILE I was recycling last year's craft show
snowmen into scarecrows and Santas:


I'm missing approximately 60 photos that I took
with my phone, that didn't automatically update to
my Google album.  I'm not sure how to fix
that at the moment, so please excuse the steps
not accompanied by photos.  :)

Last year's snowmen,
with all accessories removed:


Jump forward to base coating a 1" plug nose
and the face with purple acrylic paint,
the top and bottom base coated black
then coated with black glitter paint:


Use eyebrows and a crooked smile
to make these Witches happy!

 Here's a neat trick to give
your witch face a wart (or two!):


I've been calling these carpet tacks.
Clearly I've been wrong all these years.
It says so right on the package:
CUT TACKS
What evs.


Painting a spiderweb is simple!
Pick a starting point to be your vertex
and paint diagonal straight lines outward like so:


Ugh!! Seriously??
I'm having flash issues with
all my pics now.
~ Big Frown :( ~
 
Next, connect the diagonal lines with
short curved lines:


At this point I sealed the paint with
a satin finish acrylic sealer.

Next, I painted wood star cutouts
with orange and green paint, and then
coated them with orange and green
glittery paint:


To finish, tie a large scrap of black tulle
around the picket at the top
of the witch's face:

Use hot glue to attach the tulle knot
to the picket, and to attach the
glittery painted star to the tulle:


I took the extra precaution
of tapping a 5/8" nail into the center
of the star to secure it.

 
Now prop this Happy Witch by your
front door to greet Trick-or-Treaters!!!


Aw! Now that I look at her, she
needs a little something more.  Hmm.
Also, I wish I had corrected the
flash on these pics ...
I'm getting wrinkles having to squint
my eyes to see her face.

Oh! I also made some miniature Witches!!


I snipped the prongs off of
some eyeball brads and hot glued
them to the bows.
Hee Hee

Made some Frankenmonsters, too:


~ Peace and Happy Halloween Characters ~

Saturday, September 15, 2012

Baby Jesus Ornament

This little craft is perfect for the
classroom - even the very young could
make these if you did a little
prep work ahead of time.
 You'll need the following supplies:
A 3/4" round head button plug,
a Woodsies giant oval,
a Woodsies small oval,
a scrap of gauze
(I had mine left over from Halloween)
acrylic paint: Flesh Tone, Marigold,
Extreme Glitter Gold, Multi-Purpose Sealer,
pink powder blush, a cotton swab,
a hot glue gun, glue sticks,
a permanent marking pen, a button, 
and a ribbon scrap.

Baby Jesus ornaments make me happy!
Here are two of my earlier designs:
  Hmm.  This one must be so old
I haven't even blogged about it.
I will put this on my To-Do List.  :)
Back to this year's ornament:
  Paint the button head Flesh Tone and allow
to dry thoroughly.  Blush the cheeks
with pink powder blush and a cotton swab.
Seal with Multi-Purpose Sealer.
Paint the small oval Marigold.
When dry, brush with Extreme Glitter Gold.
 
 
 Wrap the gauze scrap around the oval.
I found that really stretching the
gauze tightly and tucking in all loose ends
works the best.  Use hot glue
to secure the end of your gauze on the
back of the oval.
 
 Once your painted pieces are dry,
you're ready to assemble the ornament.
 
Put a small amount of hot glue on
the front bottom of the halo;
press the back of the gauze wrapped
oval to the front of the halo.
Flip ornament over.
Use a dot of hot glue to attach the
ribbon for hanging to the back of the halo.
For added support, I used a button
to sandwich the ribbon between
the oval and the button.
 
 
 This is what the front of your ornament
should look like.
Add closed eyelids by drawing two
"U" shapes with the pen.


I thought the ornament still needed
a little something, so I dug
through all my supplies until I found
this holly sprig.  I think I liked it because
it looked so much like my earlier
ornament where I painted the 
swaddling clothes and I painted the
holly sprig.  Any little decoration would
do ... a star, a heart, be creative.


~ Peace and Baby Jesus Ornaments ~

Thursday, December 16, 2010

Sizzix Blog Hop - Treat Bag Toppers

If you're hoping I saw something
a little different this time ... like a chick
or a duck or an owl ...
I didn't.
I do love these treat bag toppers.
Don't limit yourself to topping treat bags -
or don't limit your treats to sweets.
How about a homemade ornament?
Or a gift card?  Or a small toy?

  
Merry Christmas!
You've been good this year!!


Friday, December 3, 2010

School Spirit Ornaments

For the past twelve years, I've been painting
Christmas ornaments for
all the kids in my child's Mother's Day Out program,
Kindergarten, and Elementary School classes.


Of course, that first year I only had to make ten.
This year ... EIGHTY!!!

I wanted to post one of each of the ornaments
I've made over the years, but
since my tree was fully decorated
after opening the first three boxes of ornaments,
I'm thinking they must be still sitting
in the barn.  Perhaps I'll start
opening the boxes from the BACK of the stack
next year - shake things up a little!


Check this out.  I painted jumbo craft sticks and
sent them home with my QCG
(Qualified Crafty Girlfriend)
to have her husband cut the rounded tips off.


This is was she brought me the next morning:


Look what he did!
 How wonderful!  Perfectly trimmed and bundled!
I LOVE this!!!


For each project, you'll need a mini chalkboard
(I used 3" x 3" and 3" x 2")
a craft stick, a chunky painted bird, a tiny Santa hat,
red acrylic paint, white paint pen,
and a partridge in a pear tree.


Paint mini chalkboard trim red (thank you, QCG!)
Paint craft stick red, sand the edges,
and use the paint pen to write the school's name.
My kids have "CLEORA"
and the twenty-five we made for QCG's kids
say "RIDGYS"
 

Use Tacky Glue to attach the craft stick to the chalkboard.
I allowed these to dry overnight. 


Here are my chunky painted birds.  I found them here:
 http://factorydirectcraft.com/catalog/products/1302_2533_1857-20713-primitive_carved_wood_red_birds_package_of_12.html


Here are my tiny Santa hats:
I found them at Hobby Lobby.

 
 And finally, the holly ... just to add color.
Again, Hobby Lobby.


Okay - I'm off to hot-glue eighty tiny Santa hats
onto eighty tiny chunky painted birds
so I can hot-glue eighty Santa-hat-clad birds
onto eighty mini chalkboards
then add the holly - for color - 


Peace Out!!!