Here it is ... the FIFTH in a series
of five Quick and Easy Bazaar-Worthy
craft tutorials!
Gingerbread NOEL Sign
This fun sign is the perfect size
for many different uses!
While is isn't to big to be an ornament,
(uh, unless you have a mini-tree)
it looks great hanging around the neck
of a bottle of wine,
(good hostess gift idea!)
tied to a package, or hanging over the rim
of a potted plant.
The Basics:
3.5" x 4.5" wood rectangle sign,
1" wood button plug, sanding block
acrylic paints: black, white, red, golden brown,
chocolate brown, Sparkle Glaze
scruffy toothbrush and craft stick
for spattering,
appropriate sized paintbrushes,
(1" wash or sponge roller for sign, 1/2" wash
for gingerbread face, liner brush for squiggle icing
and mouths)
stylus for dotting eyes,
glue gun and glue sticks,
Crop-o-Dile, hand drill, or drill press for
drilling holes, 12" length of craft wire for hanging,
wire snips and pliers for working with wire,
holiday accents such as the holly
shown here (available in the Christmas craft
section of your local craft and hobby store)
Getting Started:
Base coat your rectangle sign -
don't forget to paint the back and the sides.
Once the paint has dried, use sanding block to sand
front and back lightly to smooth the wood grain.
Sand the sides heavily, to remove some of the paint.
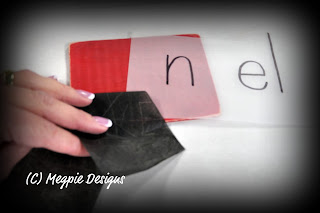
Transferring the pattern:
I used graph paper to make the pattern.
I placed the 1" button plug onto the paper,
and wrote the word "n el" around it.
The graph paper helped me to keep the
letters the right size.
Place a piece of tracing paper over
your word, and outline with a marker.
This is your pattern.
Now center your pattern onto the sign.
The transfer paper has a slick side -
this is the business side. Place it face down
under your pattern.
Use the stylus to trace over the pattern lines.
Thin white paint with water to an inky consistency.
Use the liner brush to paint over your
pattern lines.
Brush Sparkle Glaze over entire sign.
Paint the wooden button plug with golden brown,
and shade around the outside with chocolate brown.
Wet the scruffy toothbrush, dip it into
the brown paint, and blot on a paper towel.
Run the craft stick over the bristles -
away from your body - and spatter the plugs.
Blush the cheeks with pink powder blush
and the sponge dauber.
Dot the eyes with the stylus and black paint.
Thin the black paint with water
to paint the mouths.
Thin the white paint with water to an
inky consistency, and paint the squiggly
icing around the edges of gingerbread face.
Drill holes in the top two corners of the sign,
and another hole approx. 1" in from the left side.
Use pliers to make a loopy knot in one end of
the craft wire. Insert into sign with
loopy knot pressed against front of the sign.
Curl wire around a paintbrush handle.
Thread second end of the craft wire through
from the back, and make another loopy knot
to secure the hanger.
I happen to have about 200 of these holly
embellishments left over from last
year's school ornament projects.
But they're still available at Hobby Lobby,
I just saw them this week.
Thread the end of the holly embellishment
through from the front,
and bend the ends from behind to secure
in the back.
Hang and enjoy!!!
Peace and Sparkly Gingerbread Men!!!


2 comments:
Hi Meggan, love your website, you are a very talented and creative young woman. I can appreciate how
little time you have to do what you love, I went through it also, but now I'm retired and I craft 24/7 - I'll never stop until I drop, waited all these years to finally do what I love the most.
I can't wait to try some of your projects - thank you for sharing,
wishing you all the best,
Michelle Clare
Thank you so much, Michelle! I'm looking forward to crafting again soon, I've been struggling to find free time. Crafty hugs to you! :)
Post a Comment