
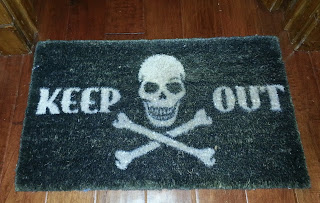
Who says skeletons are just for Halloween??
I keep this in front of the boys'
bedroom all year 'round:
You can turn a wooden circle cutout
I keep this in front of the boys'
bedroom all year 'round:

You can turn a wooden circle cutout
into a spooky skull magnet!!
And, you can keep it around for the
rest of the year. Especially if
you're a teenage boy.
Or a pre-teenage boy.
Of which I have a few.
Just sayin'.
And, you can keep it around for the
rest of the year. Especially if
you're a teenage boy.
Or a pre-teenage boy.
Of which I have a few.
Just sayin'.

I have a house full of boys.
The boys have lockers at school.
These school lockers need
groovy magnets to hold up class
schedules, phone numbers, and
other important information.
(Sometimes I employ the "don't ask,
don't tell" tactic. This may
or may not be one of those times).
(Sometimes I employ the "don't ask,
don't tell" tactic. This may
or may not be one of those times).

I thought it would be fun
to make some "Halloween" magnets
for their lockers ... and the
Jolly Roger seemed just right
for boys.

For each magnet, you will need
a Woodsies(TM) Jumbo circle
cutout, a large (1/2") circle magnet,
acrylic paints in black, white, gel stain,
One Step Crackle finish, and
clear gloss varnish.
You will also want two sizes of
paint brush (a large flat or wash
brush to base coat and seal, and a fine
detail brush for the skull and bones),
a sanding block, a clean rag, some
crafting glue, and
one tiny acrylic stone.

Base coat the front, back, and sides
of each circle with black paint.
Here's a tip:

Use a sanding block to remove the
paint from the edges of the circle.
Apply main pattern lines with
light colored transfer paper and a stylus.

Paint the skull and the bones
with white (or cream) paint.
with white (or cream) paint.


I couldn't decide whether to
go with a white or a cream color
paint for the Jolly Roger. I know which I like
better now that I'm finished ...
let me know what you think!

Once the paint was dry,
I used a white eraser to remove
all transfer paper lines.

I brushed on a thick coat of
One Step Crackle paint and allowed
the pieces to dry thoroughly.

Next, I wiped a small amount
of Gel Stain onto the front of each
circle with a corner of my rag. Then I wiped off
the Gel Stain with a (different)
cornerof my rag.
cornerof my rag.

Finally, I brushed on a coat of
Multi-Purpose Sealer.
I (photographed my child using)
a hot glue gun to apply
a hot glue gun to apply
the magnets to the back
of each wood circle.
Mainly because she begged,
but also because it's really
difficult (read: impossible) to
hold the glue gun, the wood piece,
and the camera all at once.
Unless I somehow wedge the camera
under my chin. But then I
can't see nor can I press the button.
So it just made sense
to let her glue for me. I love helpers!!


and I attached
the tiny acrylic stone with
Aleene's Tacky Glue
and a toothpick.
and a toothpick.


I think the stone makes it awesome!
The glue dries clear, btw.
I hadn't made enough of these
initially and had to dash
back out to the studio after dinner and whip
up a few more. Somehow I didn't
get a final pic of the magnet.
Good mom that I am,
I have already texted each boy
and requested they take a photo of
their magnets for me.
I figured, even if they don't get the
texts during the school day,
surely (at least one of them)
will be checking his phone immediately
after school, leaving him
enough time to dash back to his
locker and take a picture.
For me.
Mom.
Because I forgot.
Because that's just how I roll.
Remember??
~ Peace and Jolly Roger Magnets ~
1 comment:
Arrrggghh...awesome matey!
Post a Comment